Guitar Hero Fret Buttons Mod
Mod my guitar hero controller with me!
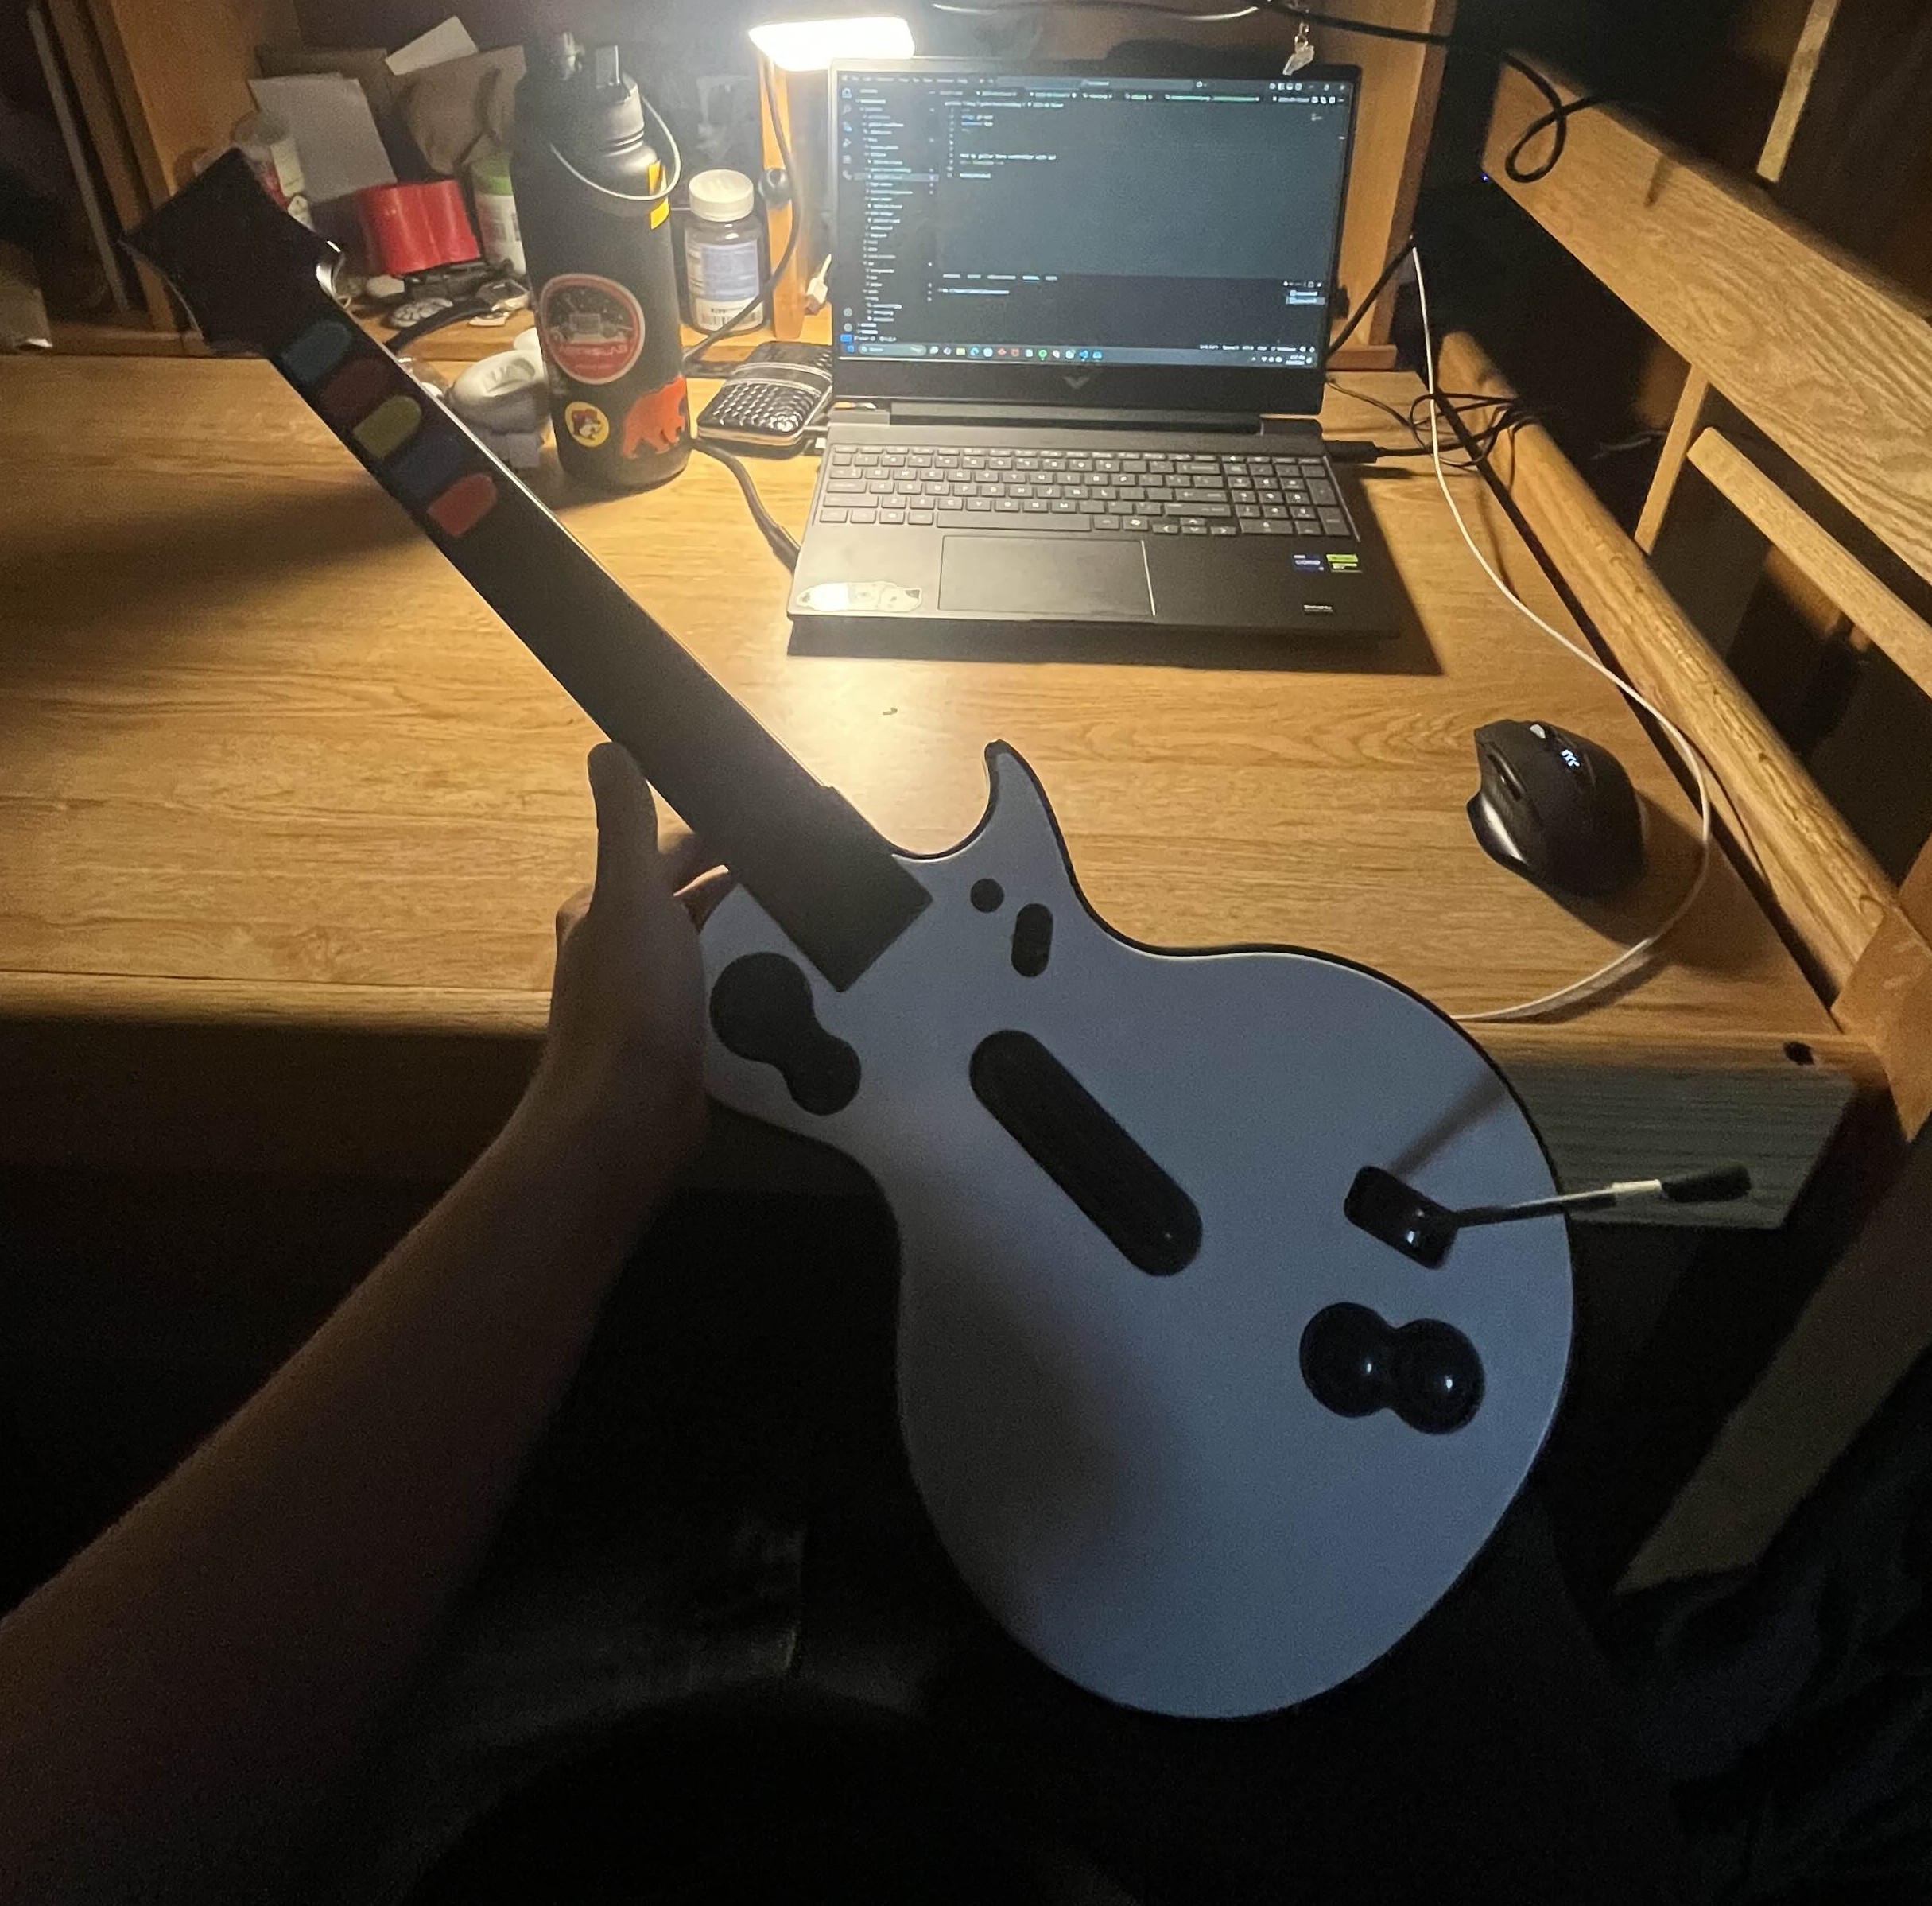
This is a mod that will make the fret buttons on your guitar hero controller firmer and more responsive. You get less of that clicking / rattling sound you get when you're playing fast, and it requires less downward pressure to fret a note.
You will need:
- Guitar Hero controller
- Small philips screwdriver
- Large-ish flat screwdriver
- Duct tape (I used painters tape)
- Scissors
This idea originally is not originally mine, but the applications I used were different than most guides so I am including it here :)
Step 1: Remove All Screws in the Guitar Neck
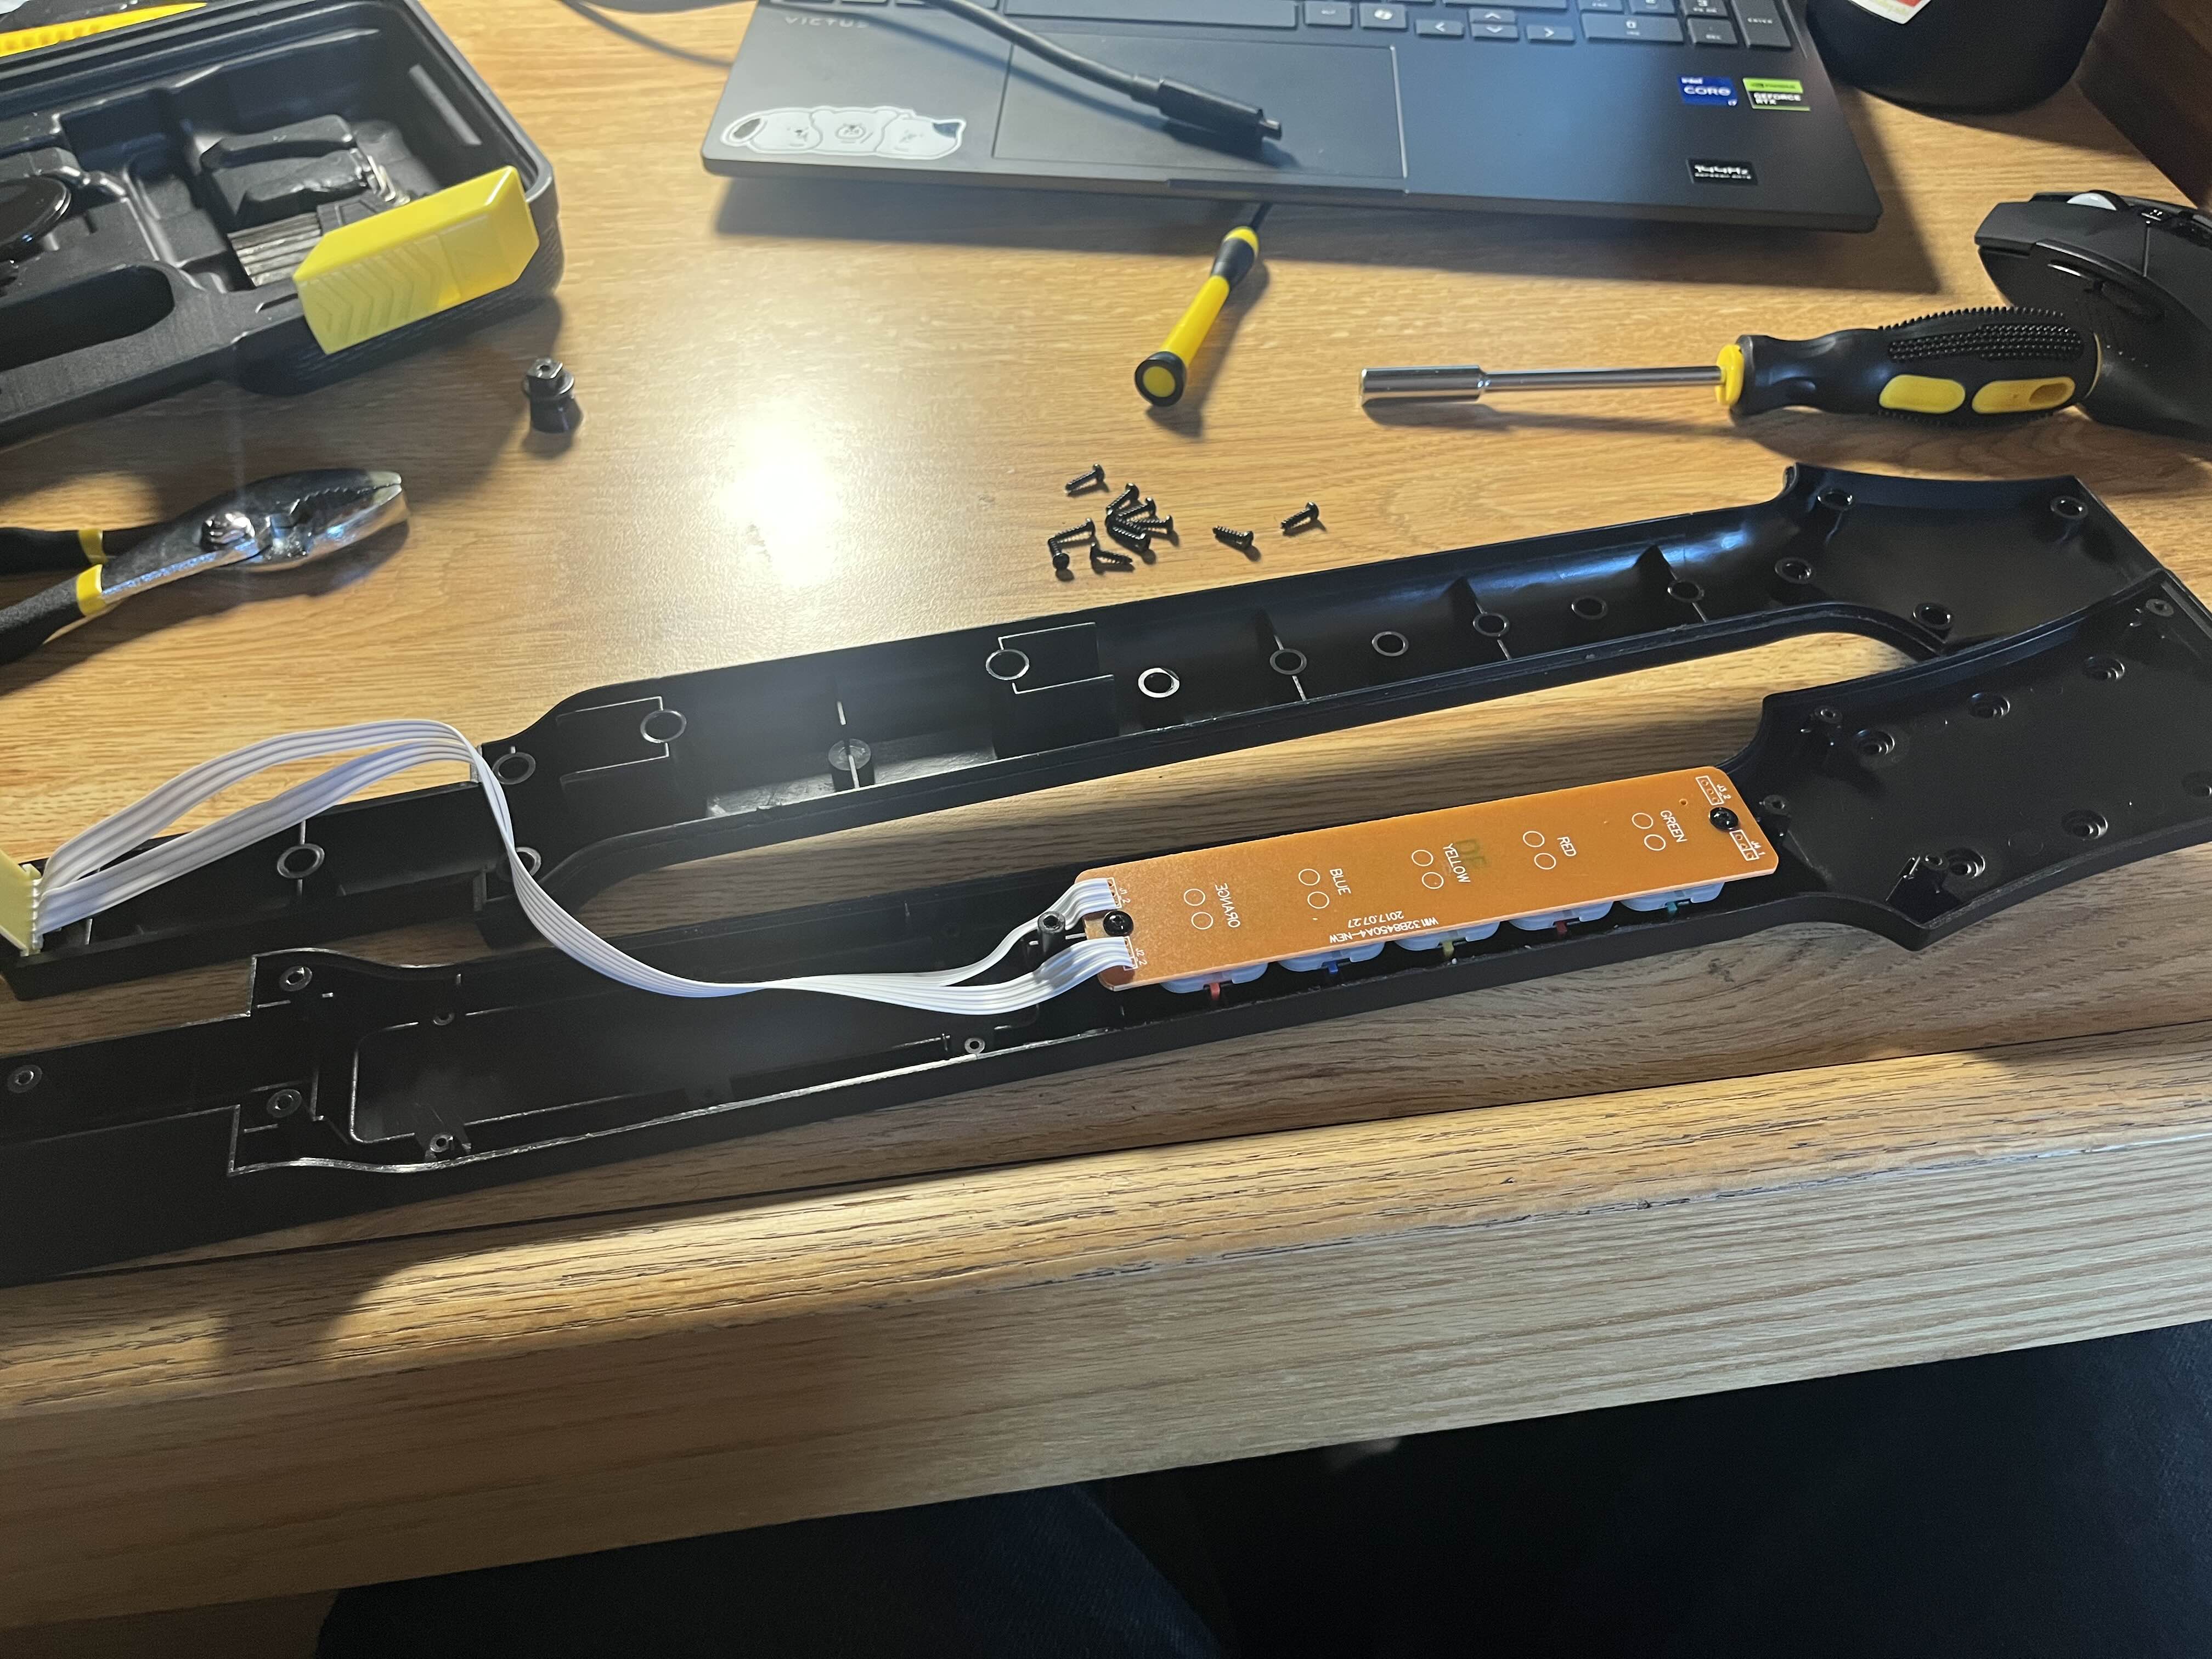
After removing the neck from the guitar body, remove all the screws from it (excluding the one holding on the strap button, unless you don't use it, and want to remove it - I did here).
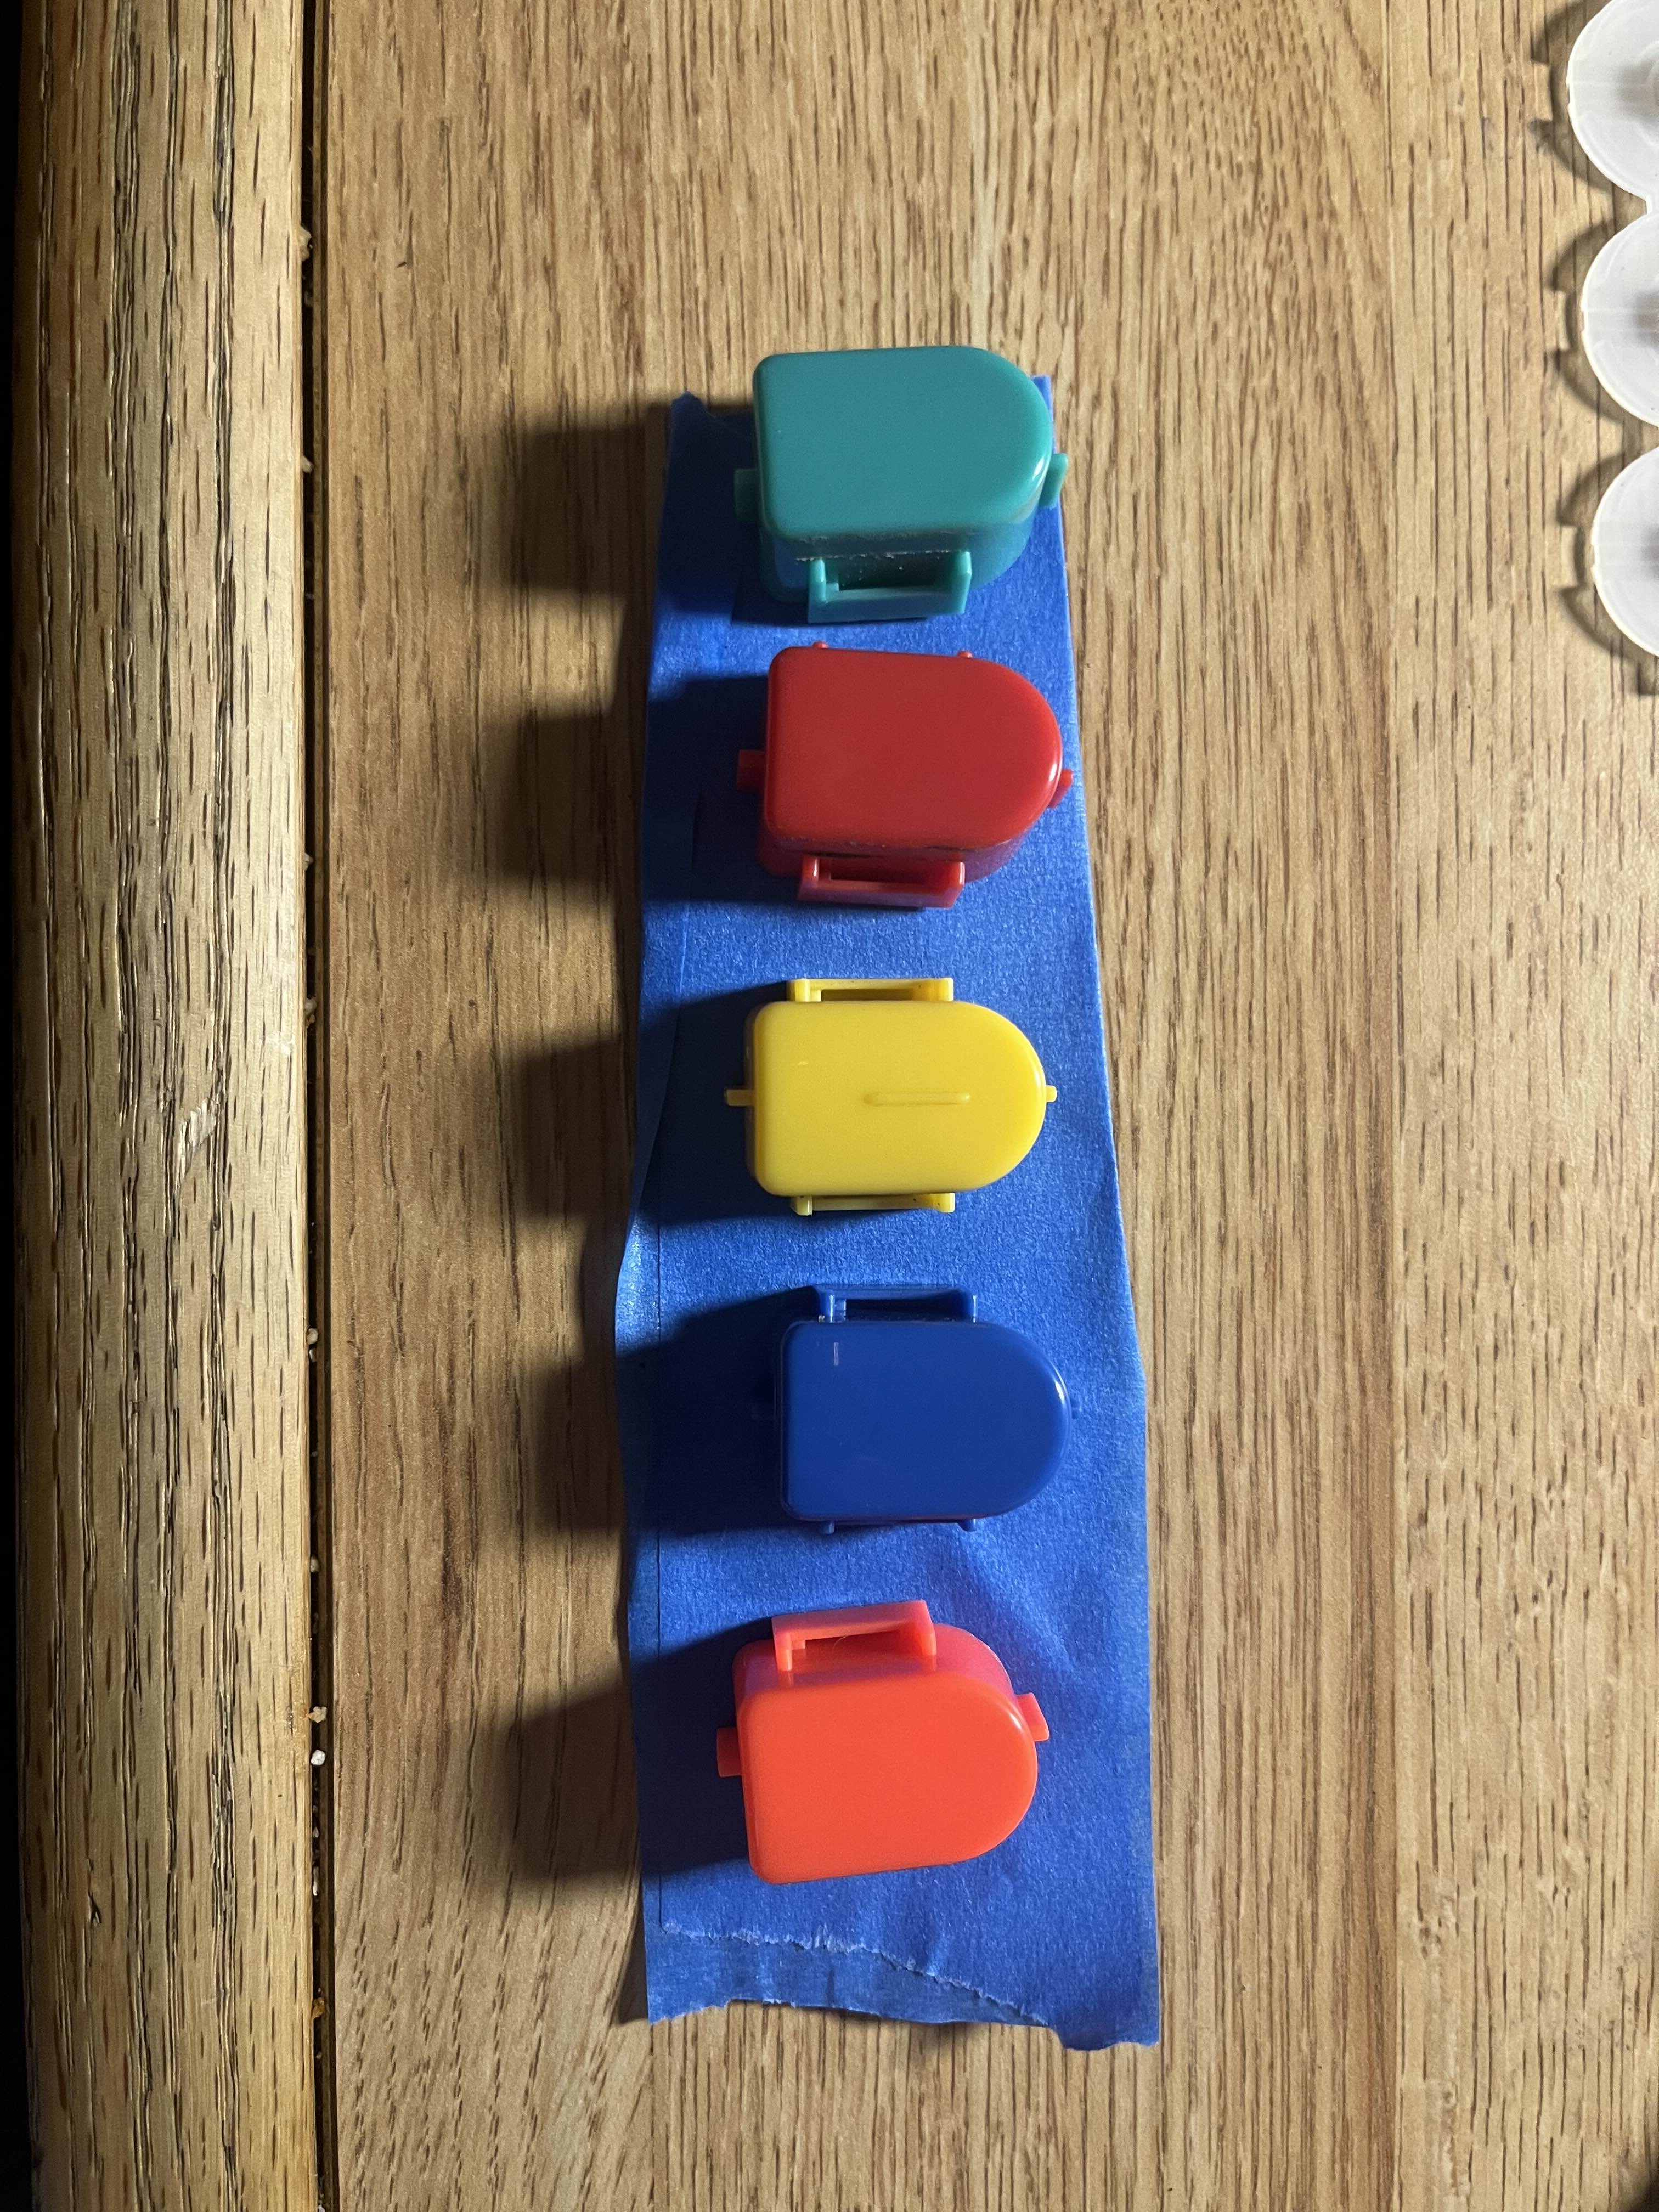
Step 2: Open Neck and Dismantle Fret Button Assembly
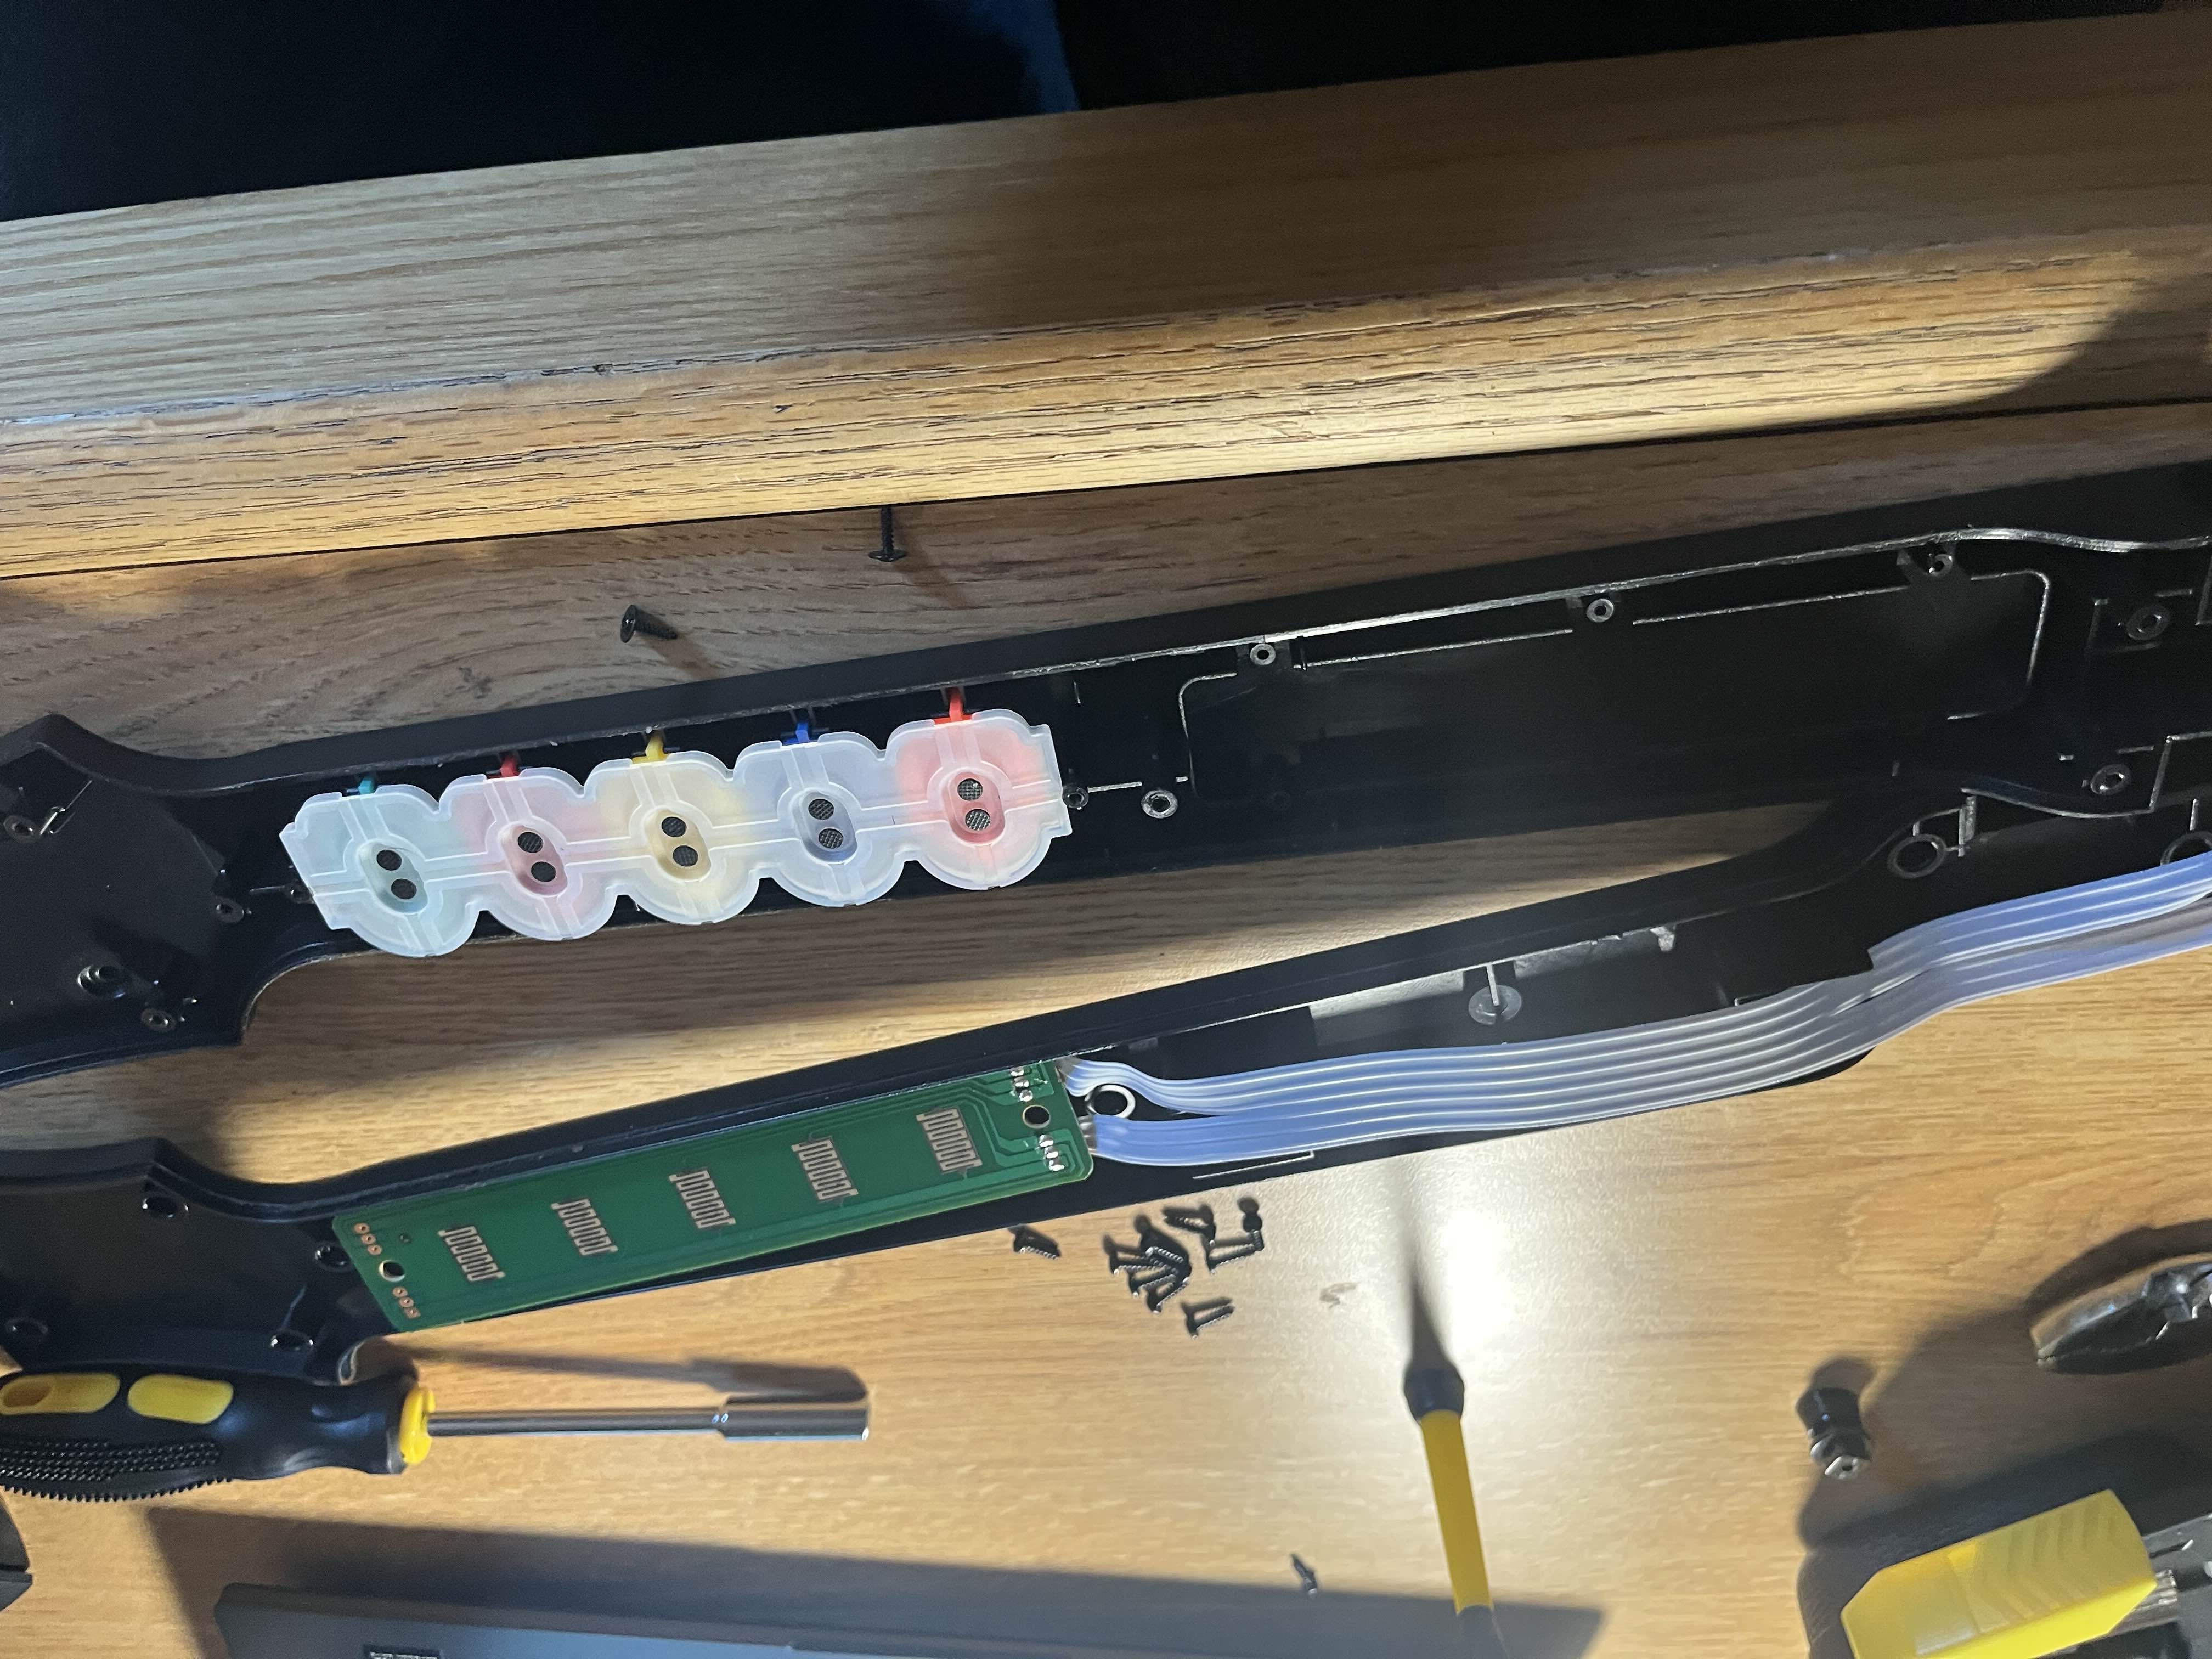
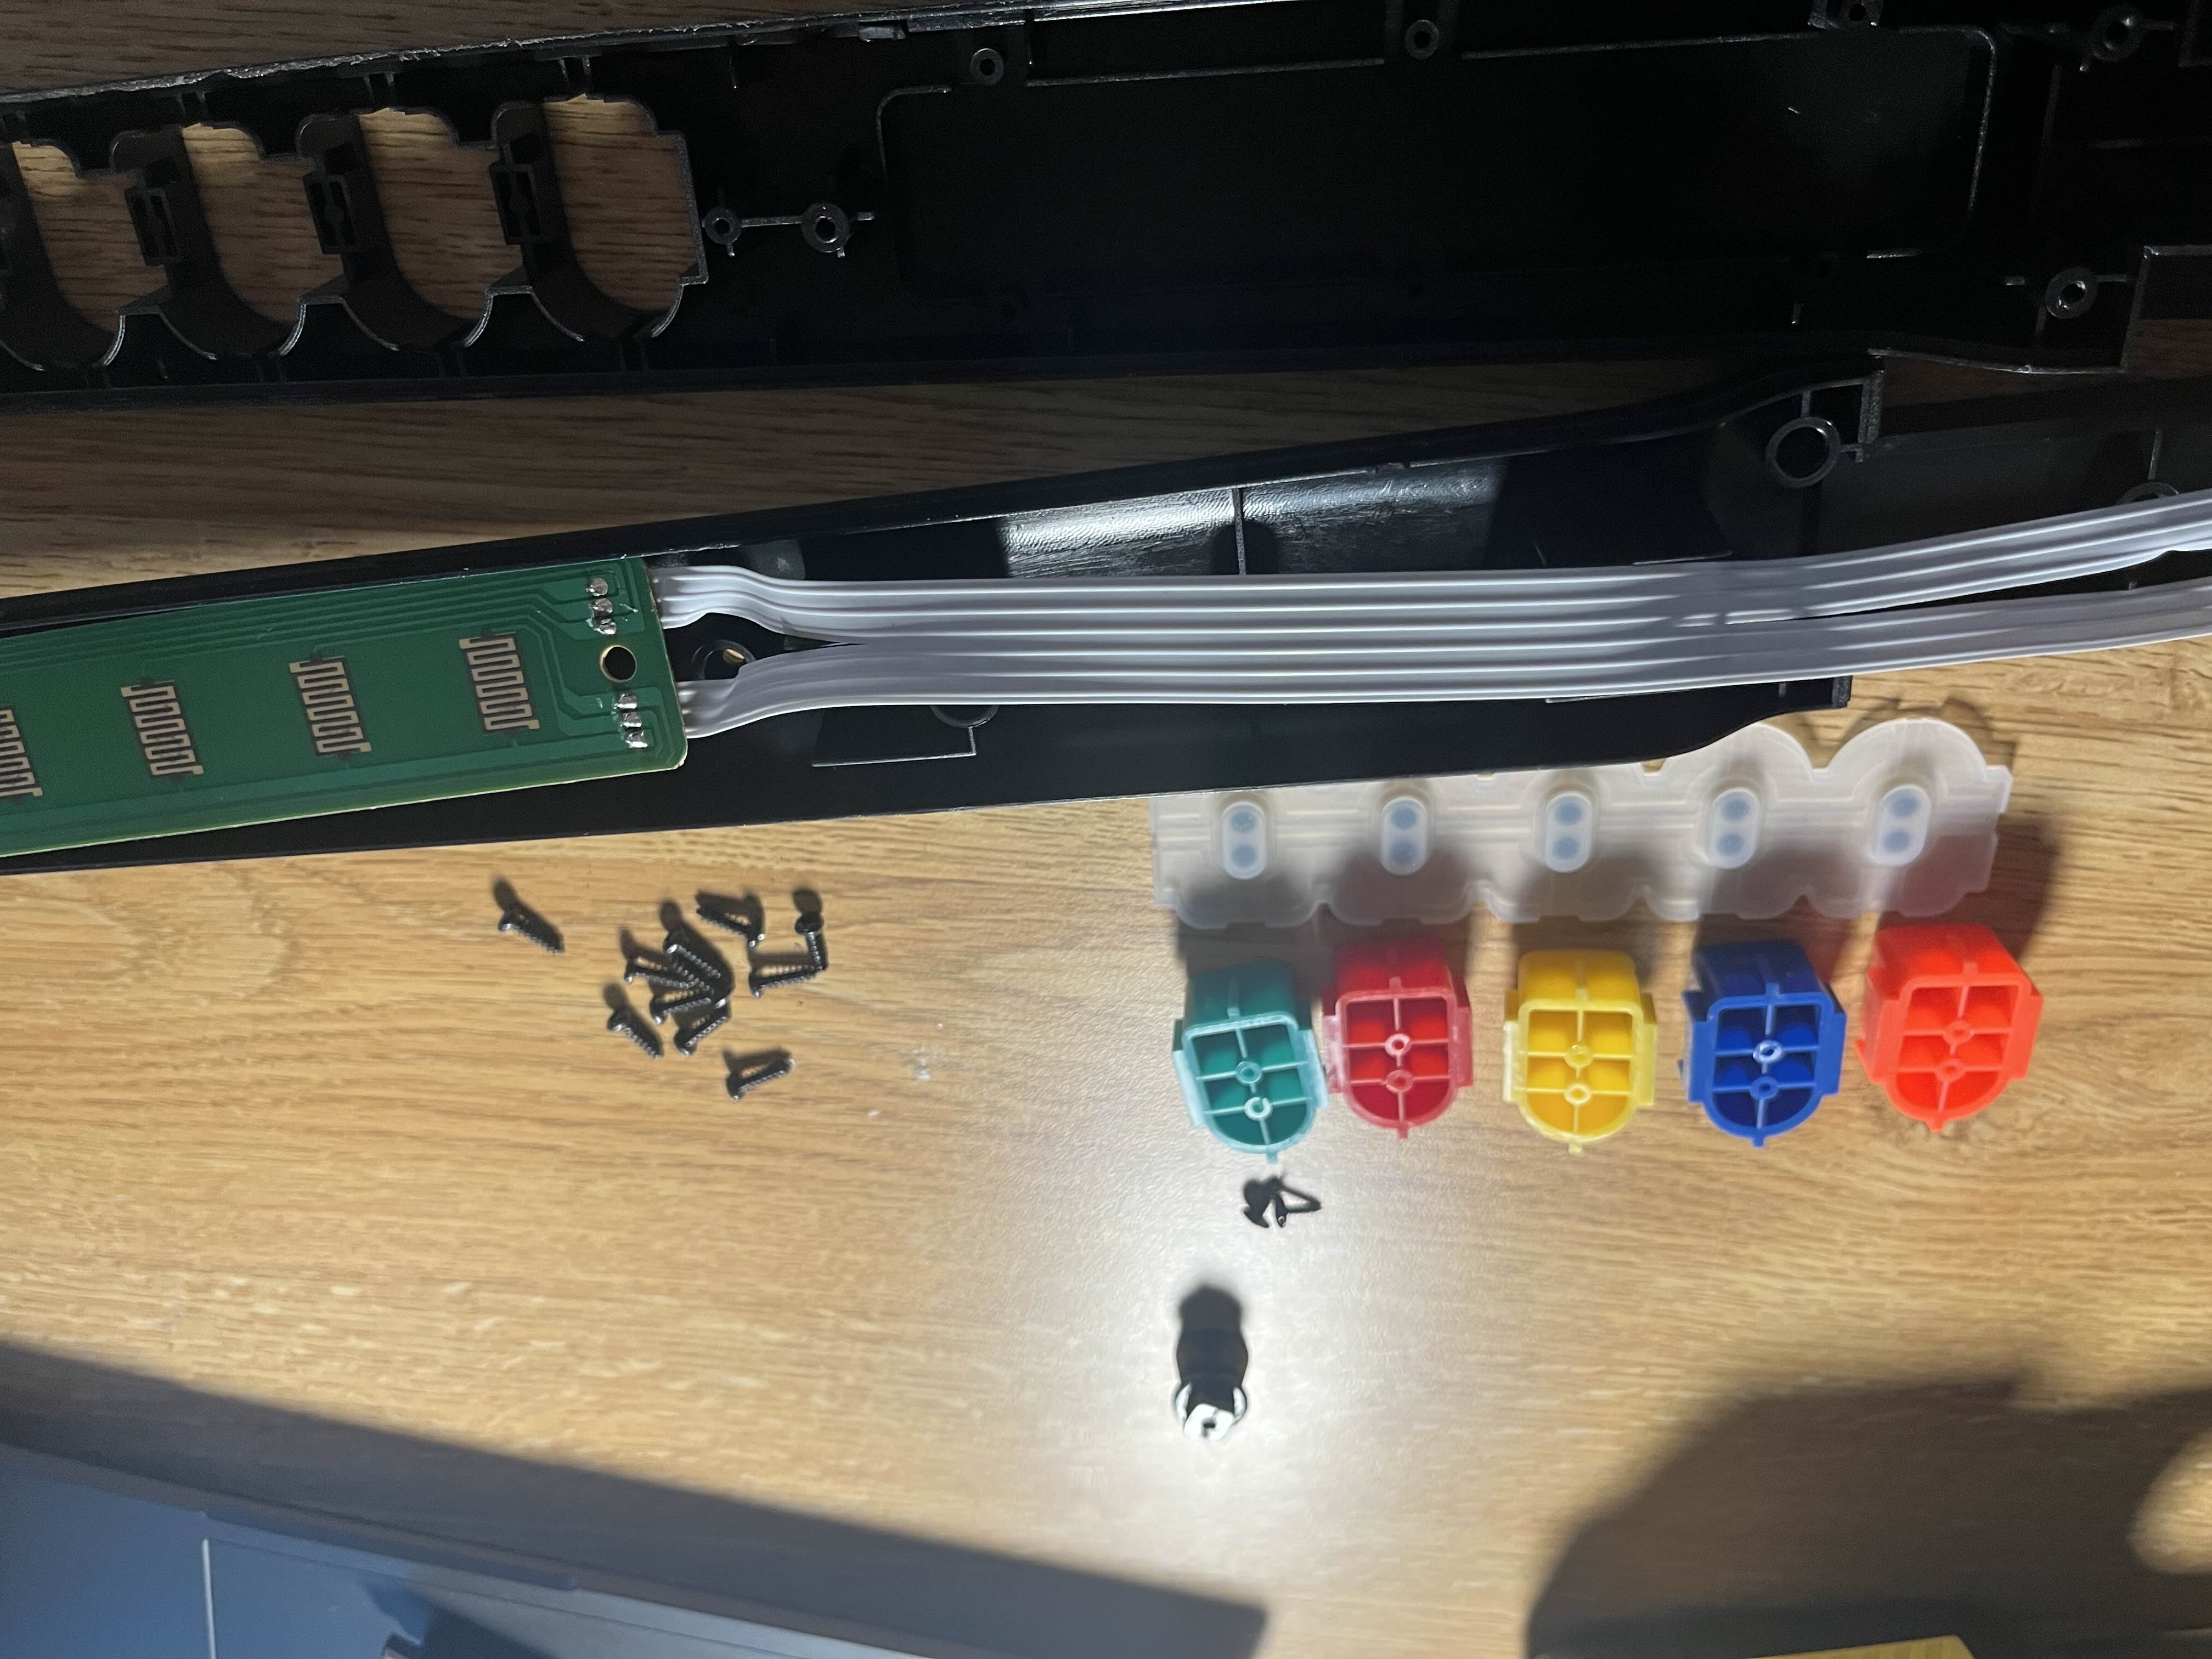
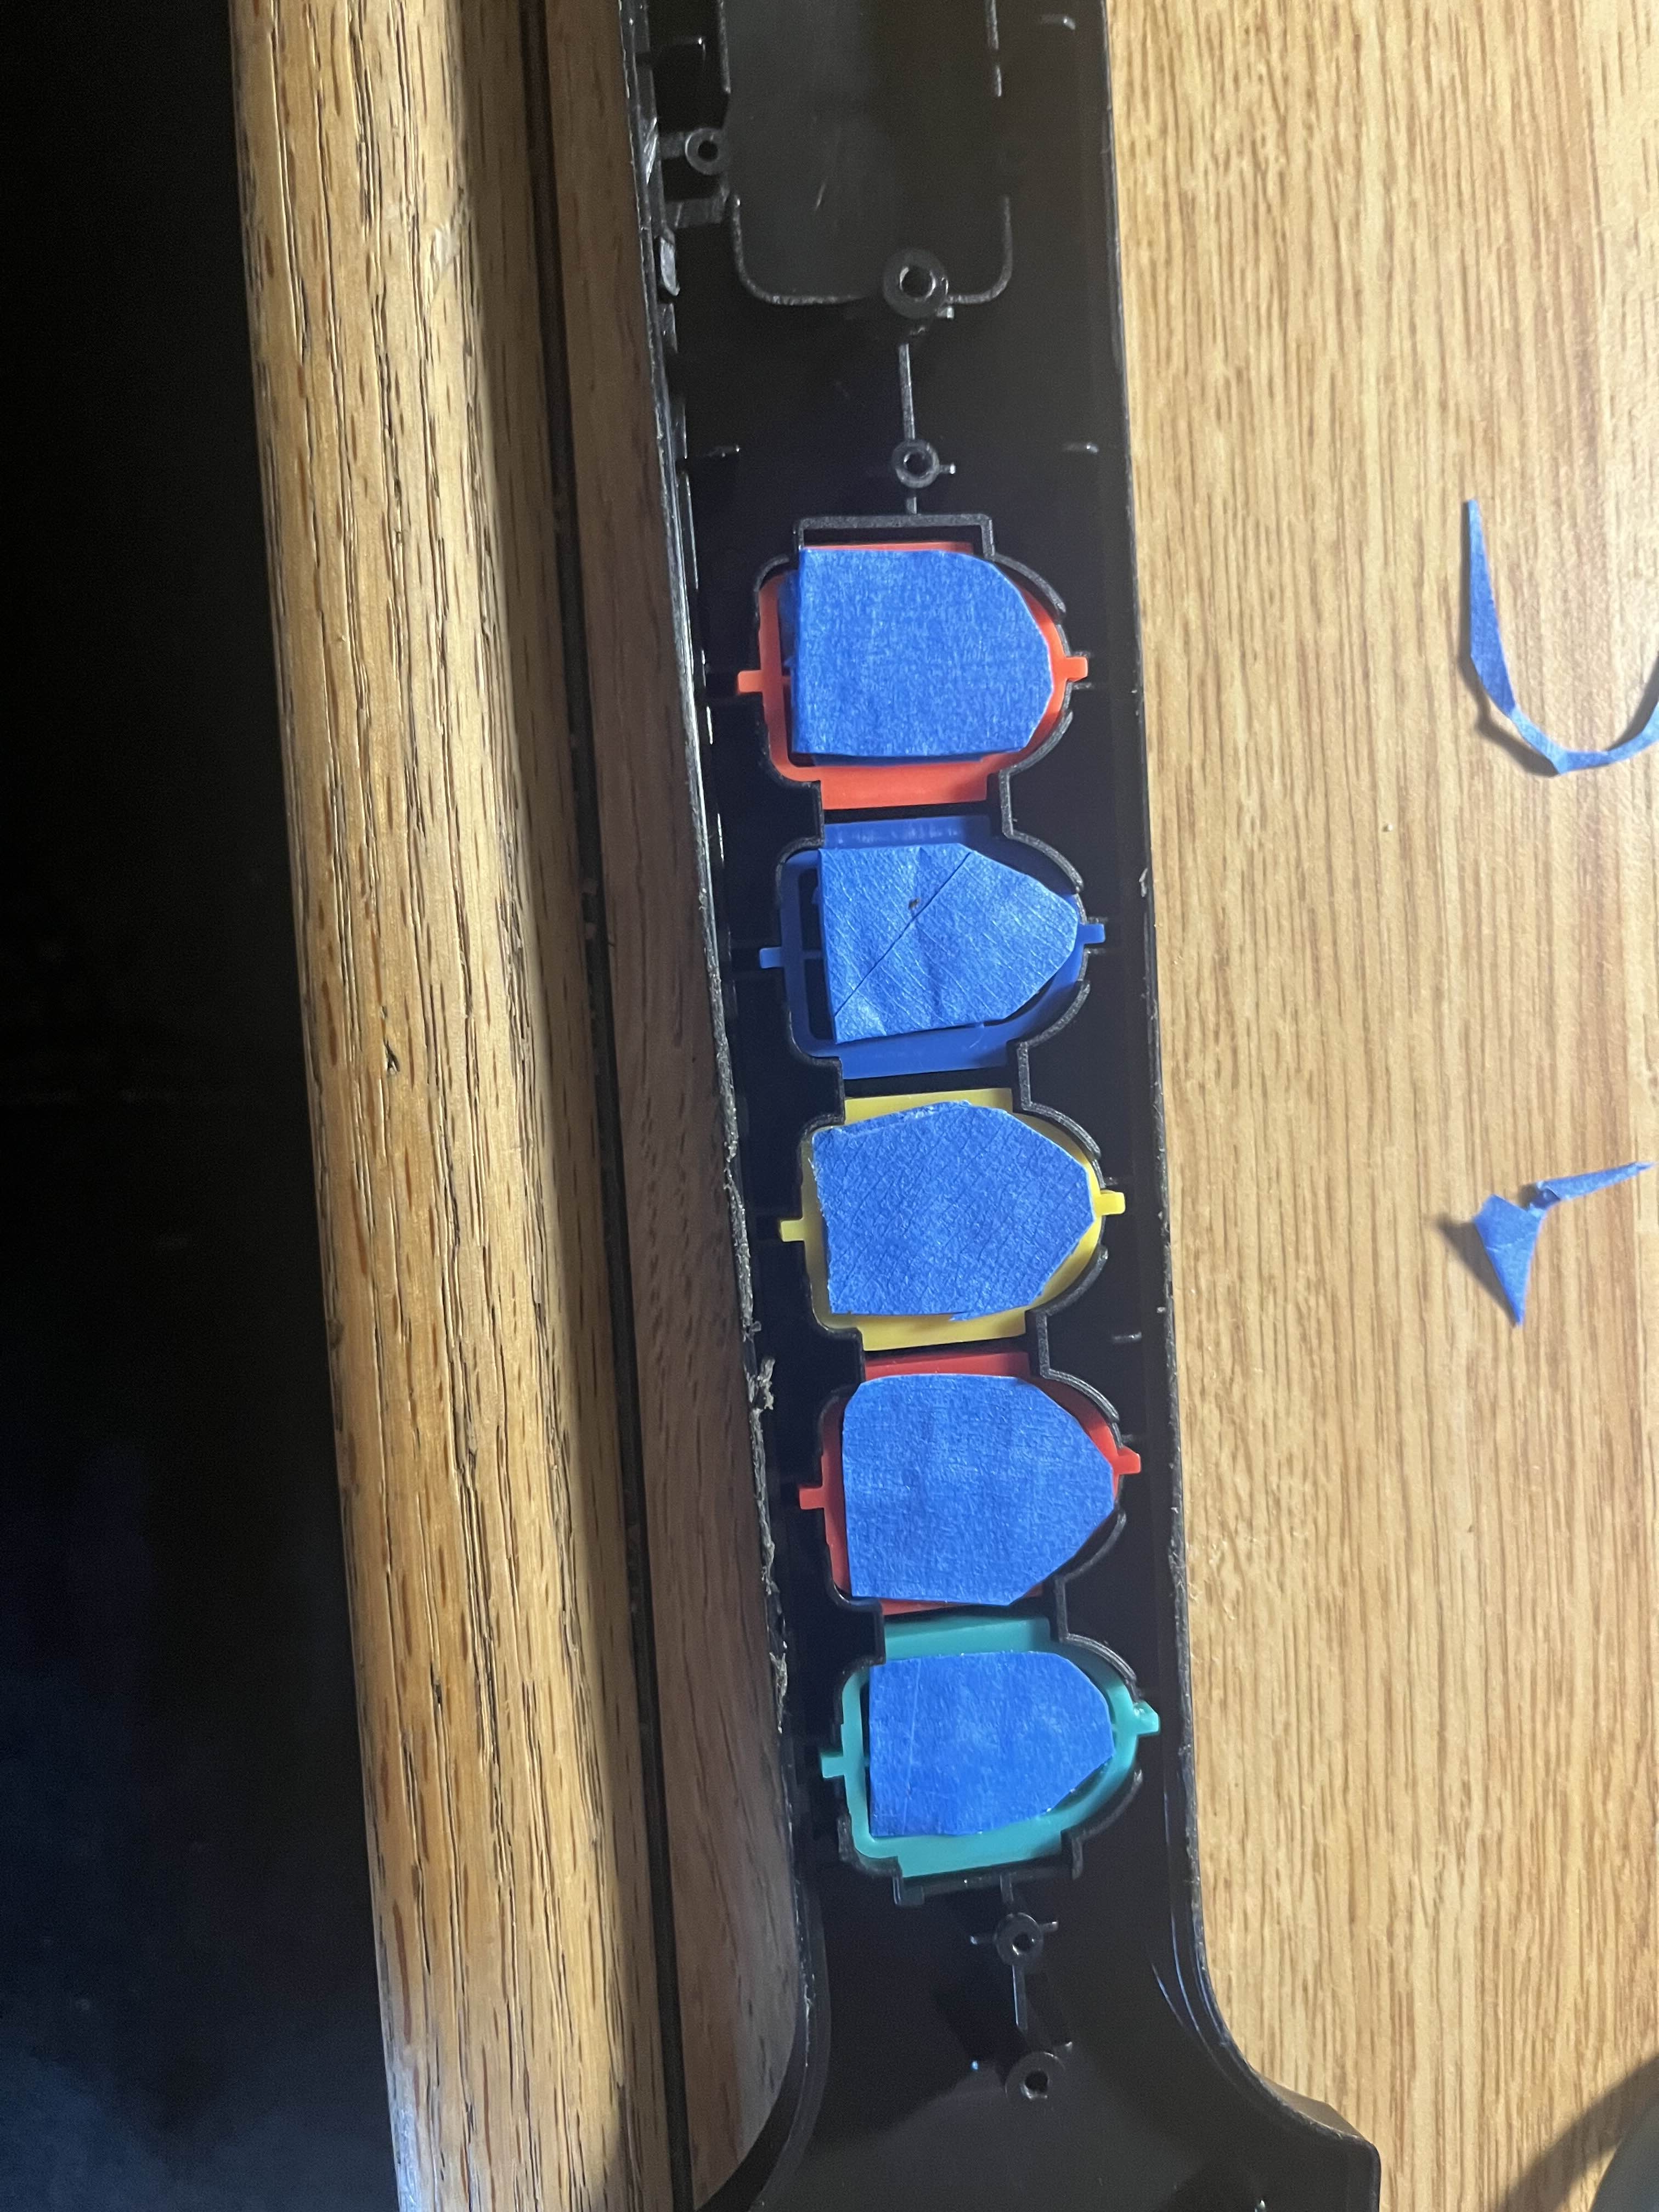
First, remove the two screws holding the brown circuit board down, using a small philips screwdriver. Carefully lift the circuit board and set it aside. Be particularly careful not to trap or fold the ribbon cable at any point as it's quite delicate. Remove the rubber pad from the buttons, and set it aside - this will reveal the fret buttons. You can now remove these too.
Step 3: Make Your Spacers
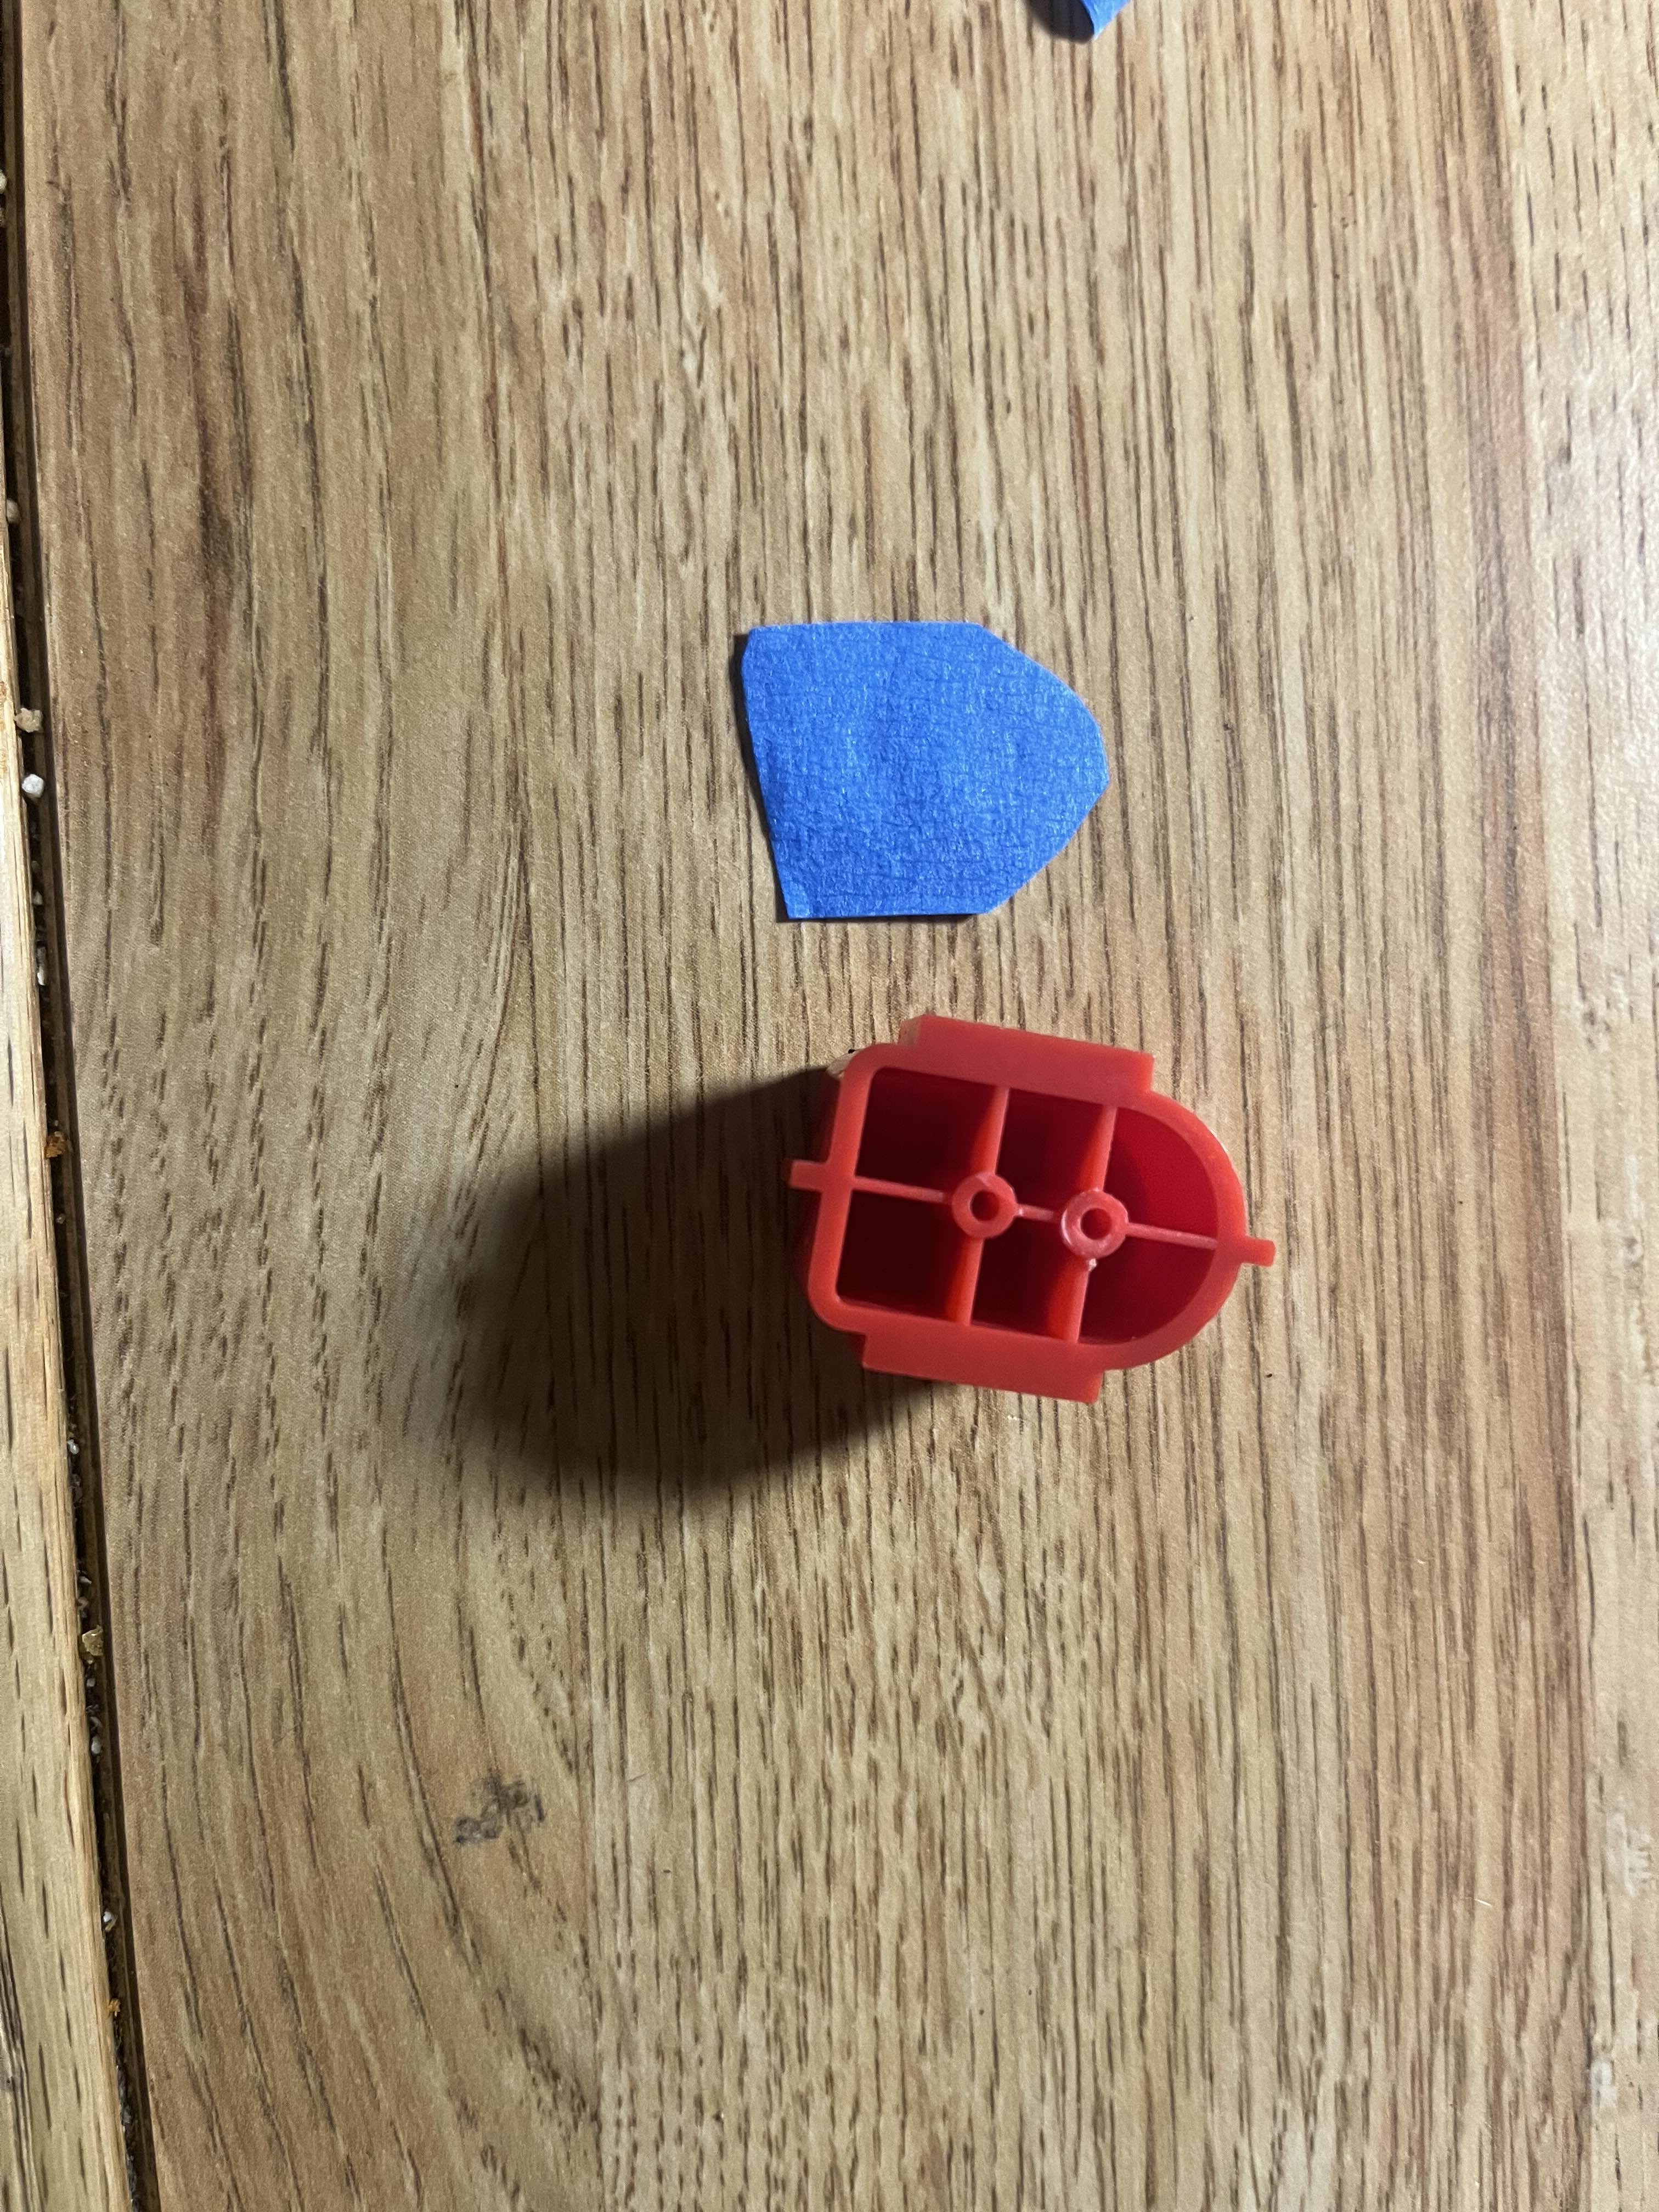
Start by sticking two pieces of duct tape together, adhesive sides facing each other. This is what the spacers are made out of. Personally I found 2 layers of tape was perfect, but if you feel more is needed (or you are using tape of a different thickness) then use more or fewer layers. Cut strips of the tape that are 1.5cm wide. Then cut these every 2cm until you get 5 pieces of tape that measure 1.5 x 2cm. Lay each one on a button to make sure that you're cutting was accurate, and there are no overlaps.
Step 4: Attach Spacers
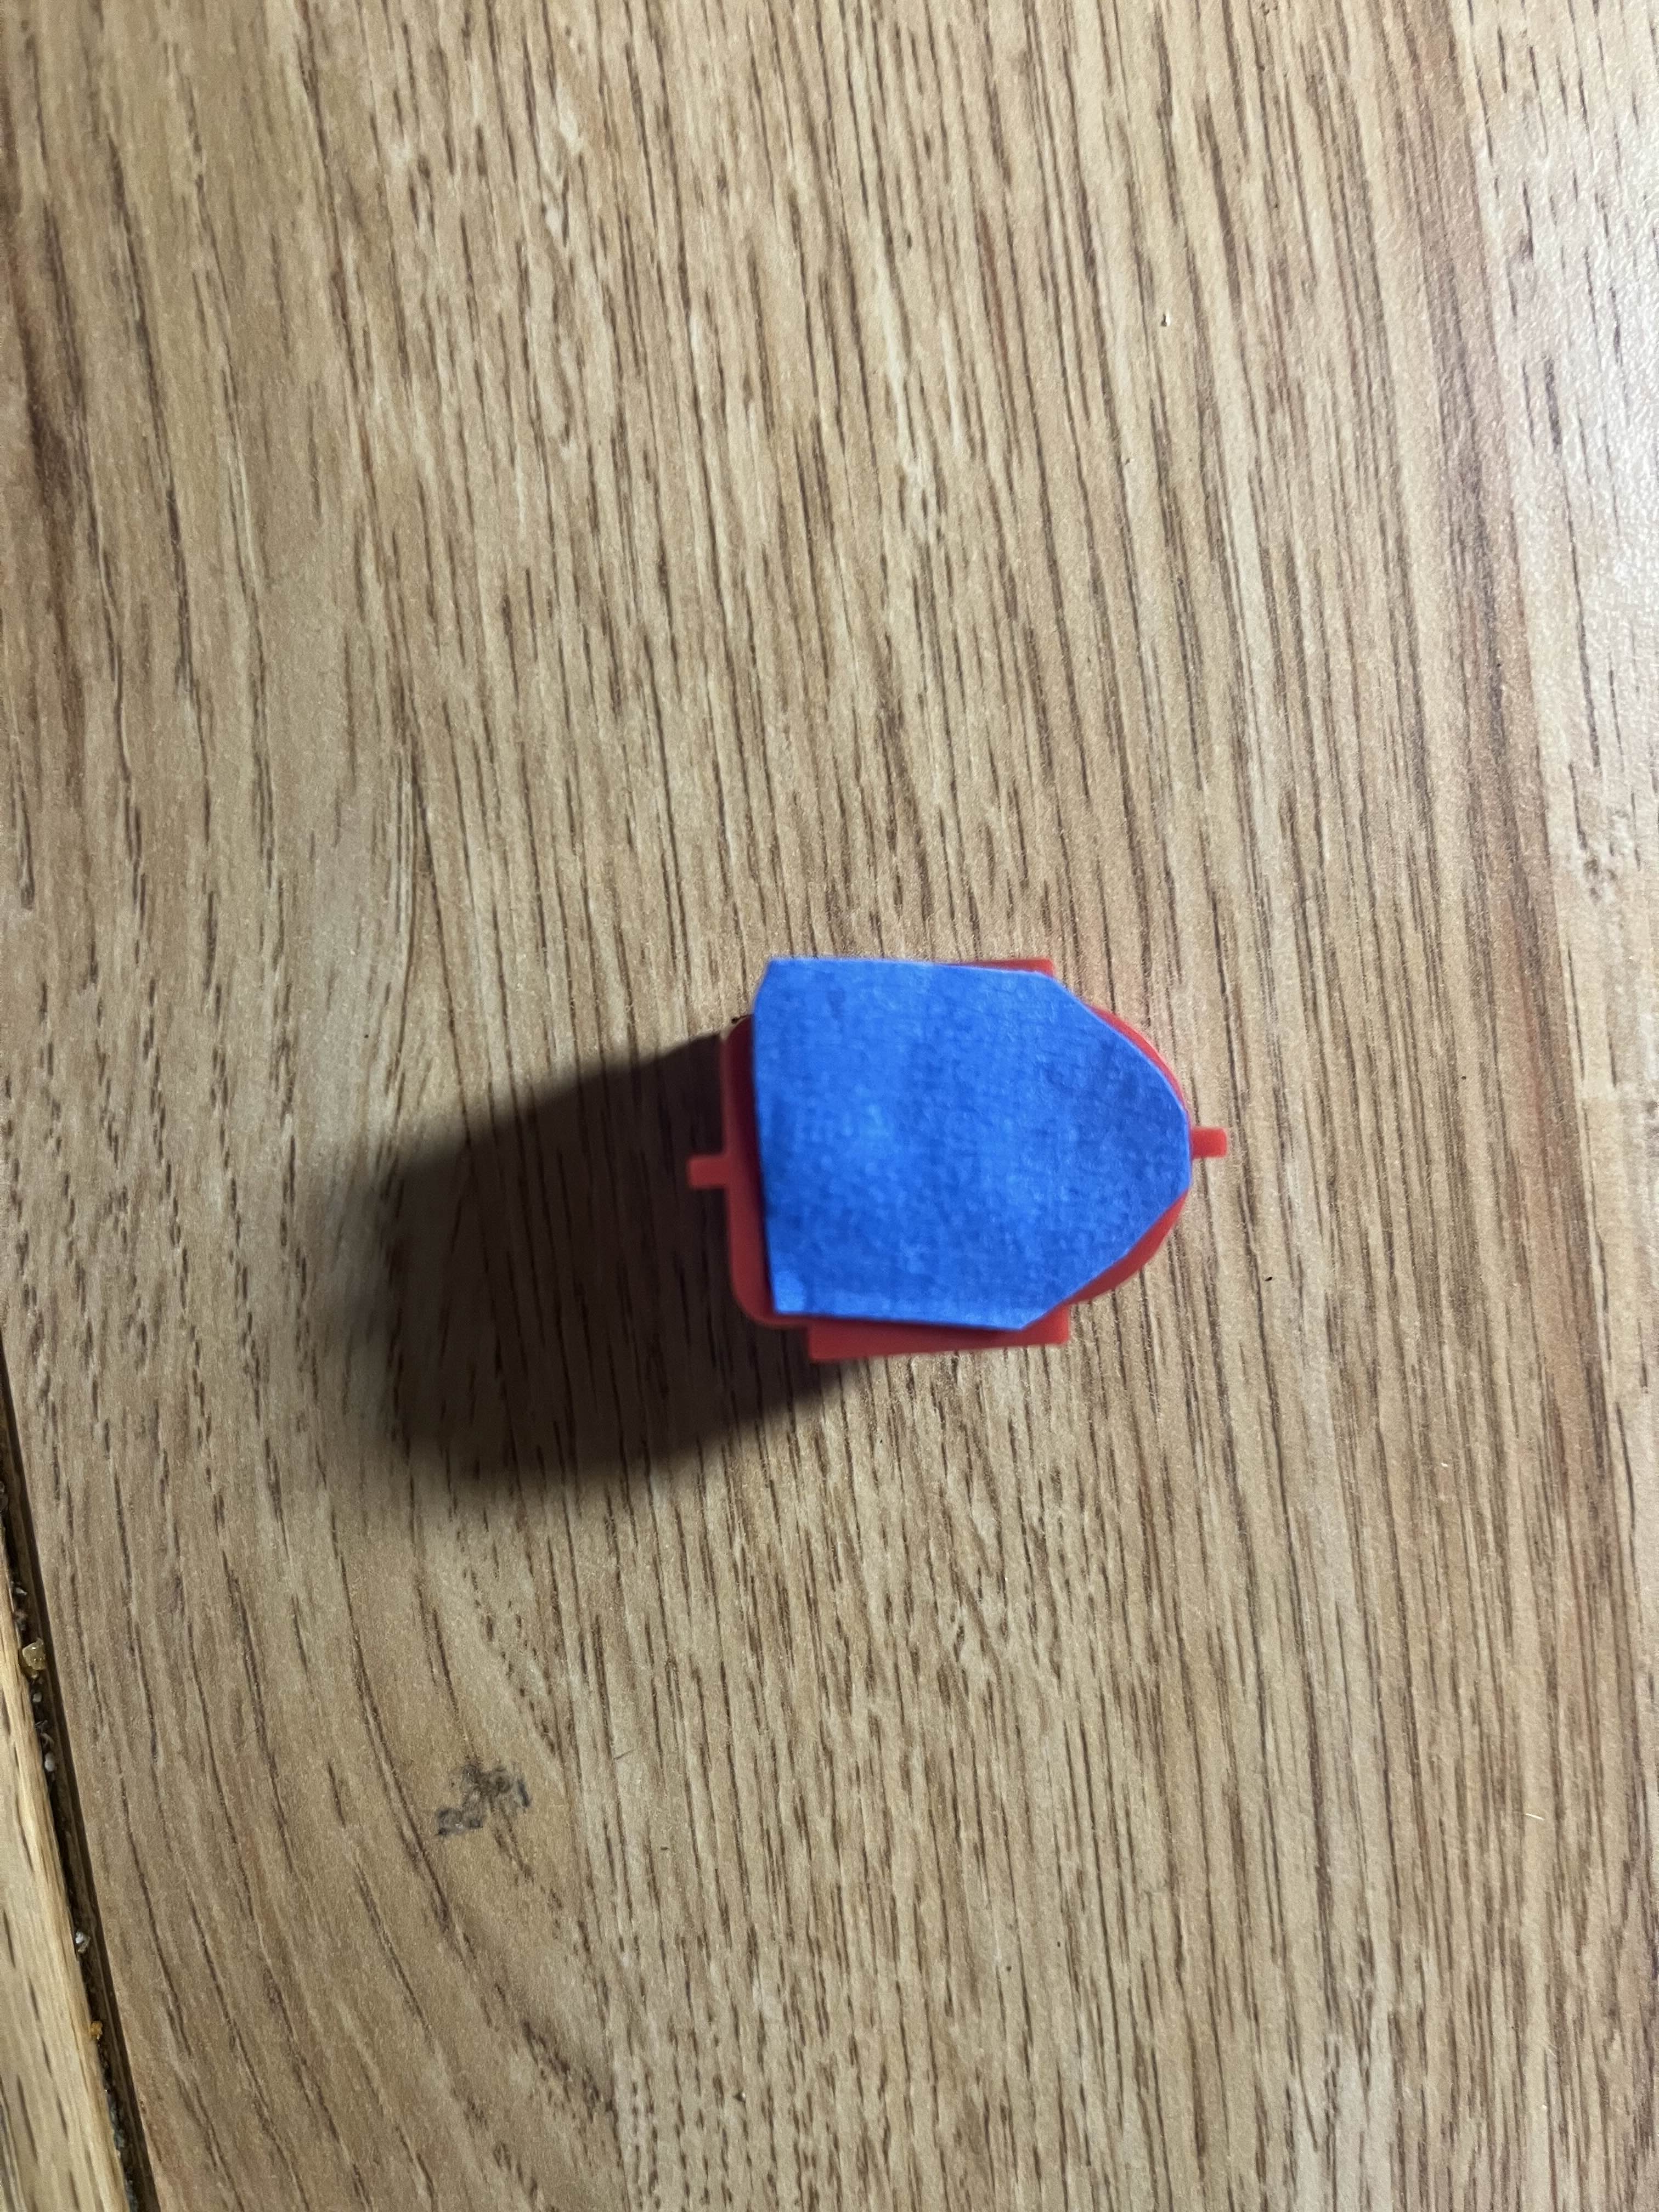
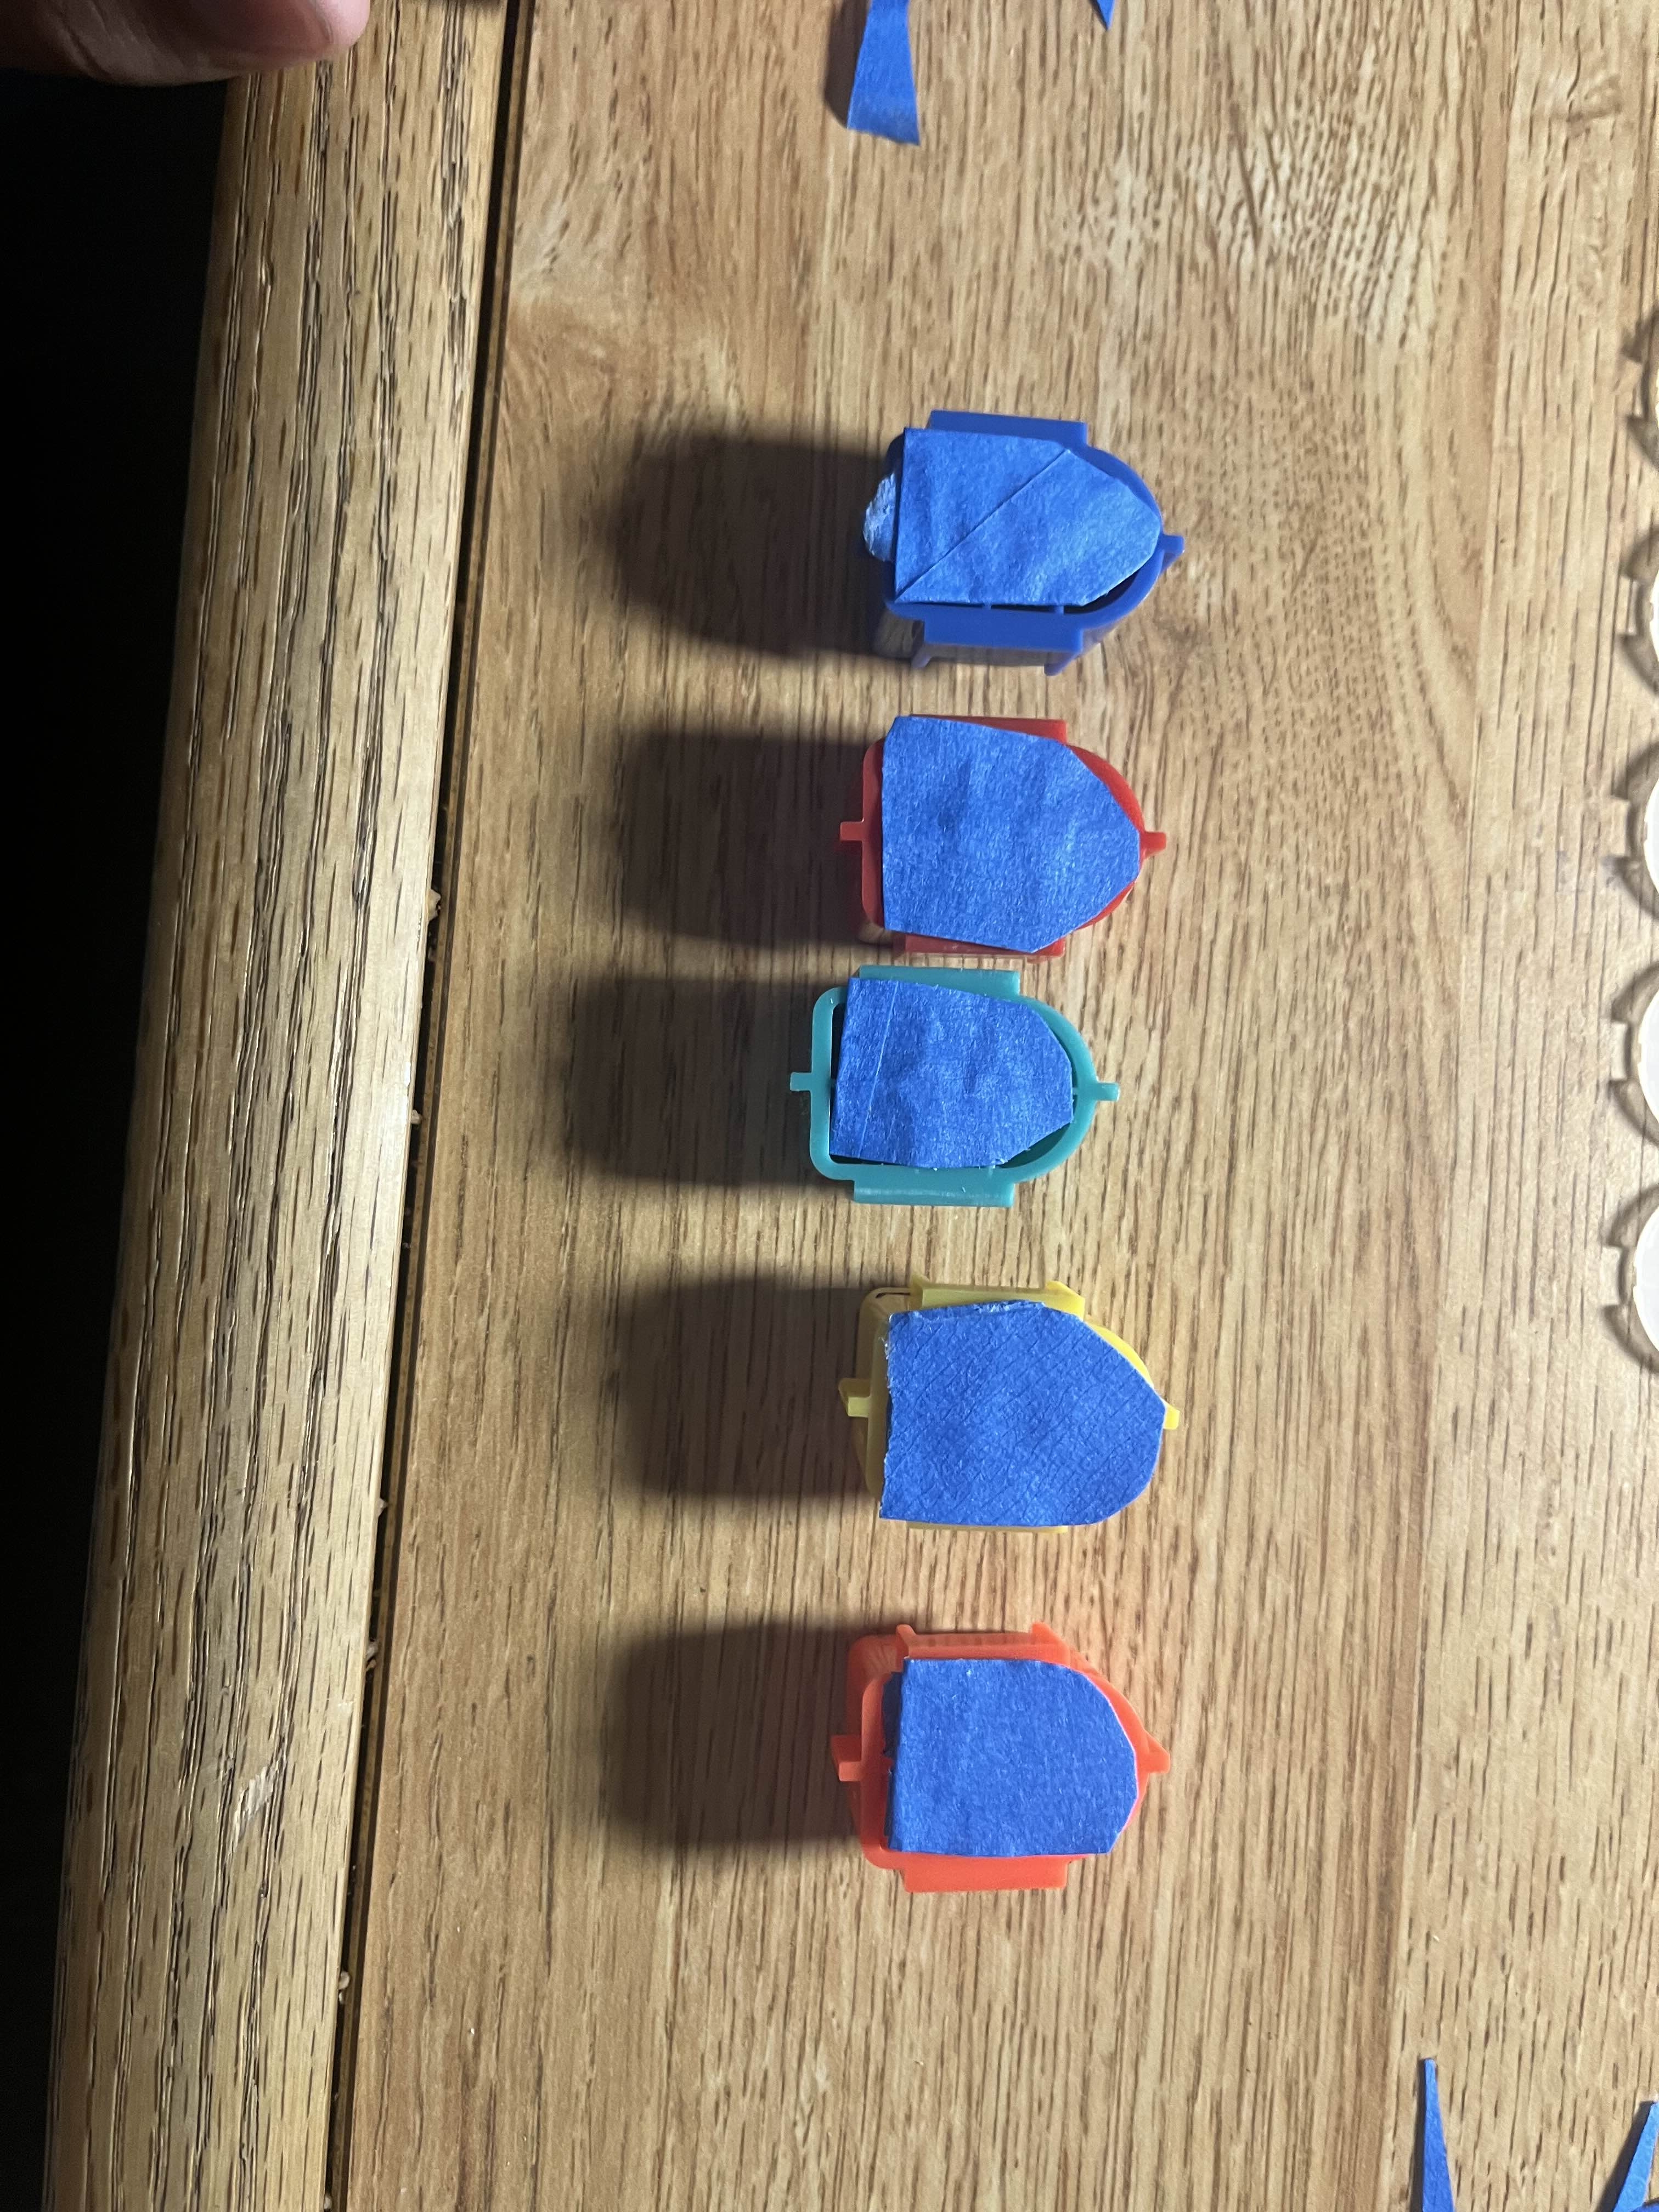
Make 5 small balls of your blu-tack (or equivalent, I used folded tape). Don't make these too big as too much will make the spacer's surface uneven. Roll one small section of tape between your fingers to make a sausage shape, and press it along the center line and 2 holes in the plastic on the back of one of the fret buttons. Then attach a spacer to this, ensuring it is central to the button and not overlapping the sides at all. Do this for all five buttons.
Step 5: Reassemble the Fret Button Assembly
Place the fret buttons back into the neck, in the correct order: green, red, yellow, blue, orange. Lay the blue rubber piece over the buttons, pressing it into place. Line up the circuit board and gently press each end to get the plastic screw posts through the holes in the circuit board. Then put the screws you removed earlier back in.
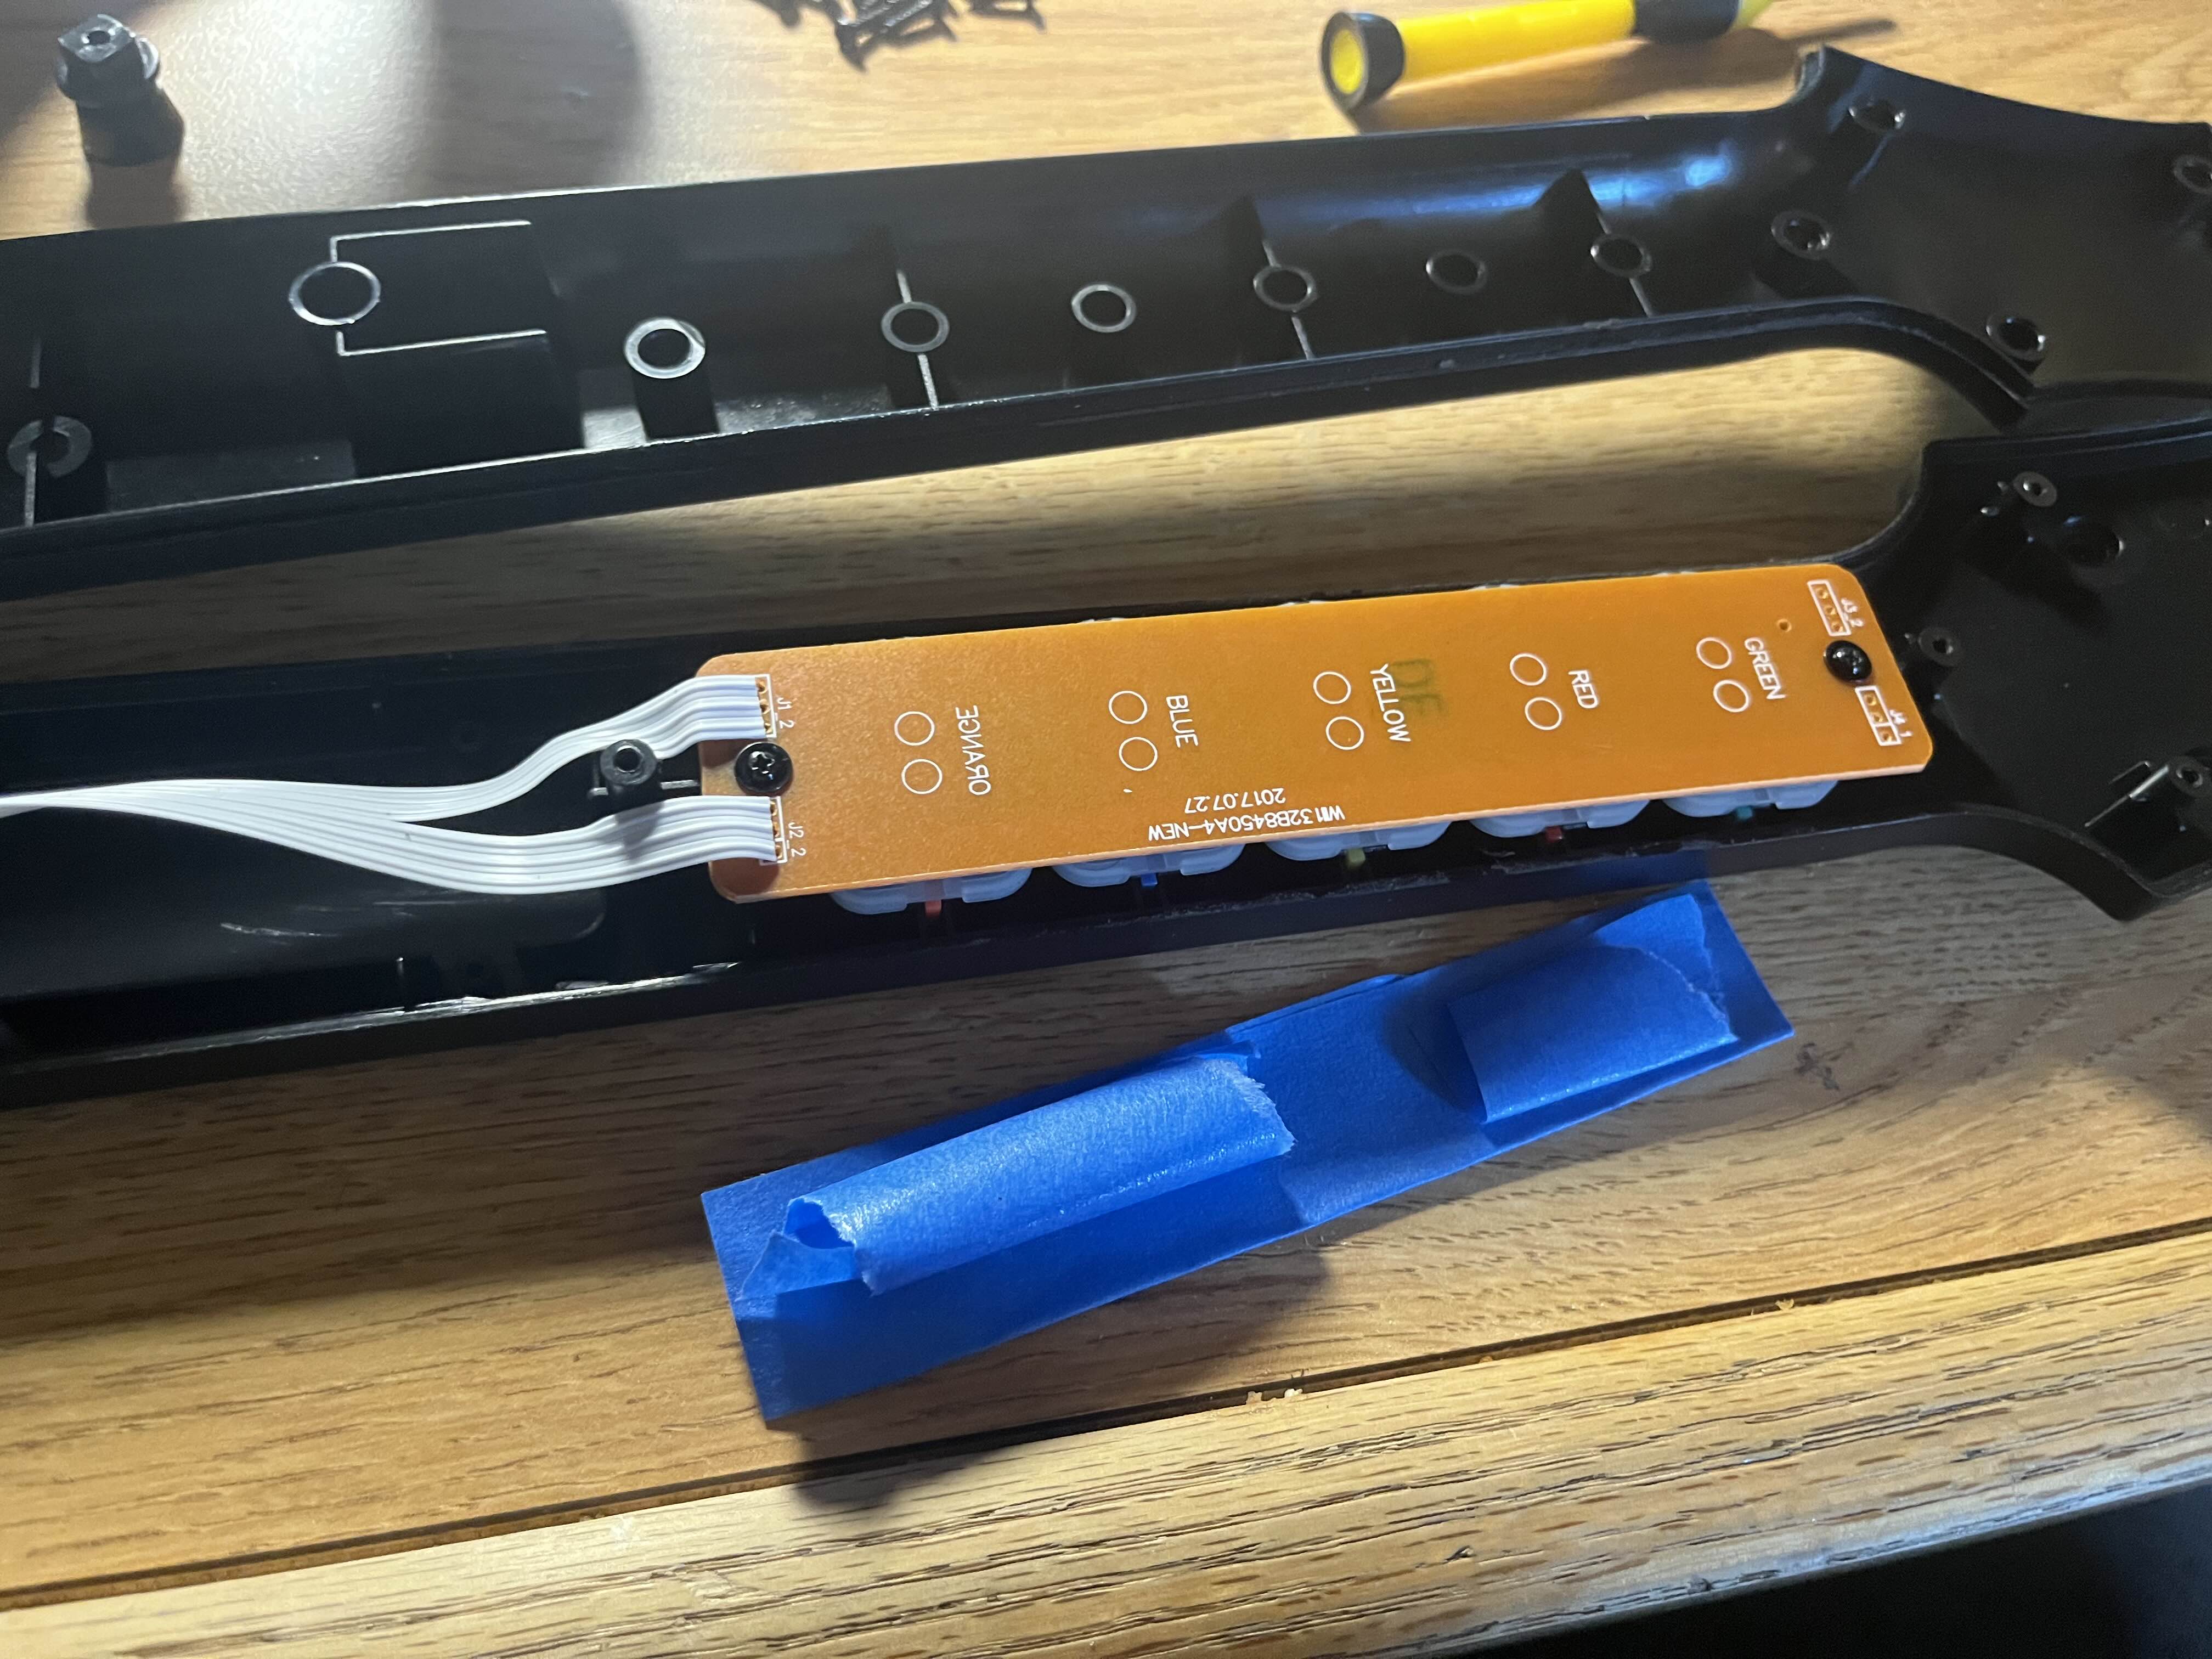
To make the buttons firmer still, add a length of duct tape (torn to a smaller width) to the back of the circuit board as seen in the picture.
Step 6: Reassemble Guitar
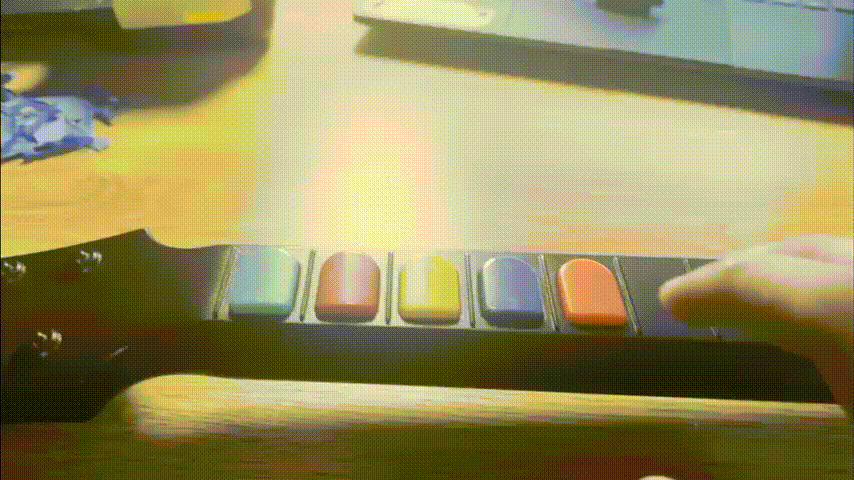
Replace the rear half of the neck, ensuring that the ribbon cable doesn't get trapped between the screw posts. Put all 9 screws back in using the Torx screwdriver. Reattach the neck to the guitar, and test it to make sure everything works. Enjoy!